
The vast and vibrant landscape of Texas offers a unique tapestry of experiences, from bustling city life and historical landmarks to serene natural escapes. For those seeking to immerse themselves in the local culture, explore sustainable living, or simply enjoy the freshest produce, cultivating a garden is a deeply rewarding endeavor. And when it comes to staple crops, few bring as much satisfaction as homegrown potatoes. Imagine the crisp texture and earthy flavor of spuds you’ve nurtured from seed to supper, a true testament to the Texas spirit of self-sufficiency and connection to the land.
However, planting potatoes in Texas isn’t a one-size-fits-all affair. The state’s immense size and diverse climatic zones mean that timing is everything. From the subtropical warmth of the Rio Grande Valley to the cooler plains of the Panhandle, understanding your specific region is the first step toward a bountiful harvest. This guide delves into the optimal planting schedules, essential growing techniques, and key considerations for cultivating potatoes across the Lone Star State, transforming your garden into a productive extension of your Texas lifestyle. Whether you’re a seasoned green thumb or a curious traveler settling into a new Texas abode, preparing to grow your own food adds an enriching layer to the experience of living and exploring this remarkable state.
Timing Your Potato Harvest: A Guide to Texas’ Diverse Climates
The key to successful potato cultivation in Texas lies in embracing its distinct regional climates. Unlike many other states, Texas often allows for two planting seasons in some areas, leveraging both the mild spring and the cooler fall. Knowing when to put your seed potatoes in the ground is paramount to avoiding extreme heat or unexpected freezes, both of which can devastate a crop.
Spring Planting Across the Lone Star State
Spring is the primary potato planting season for most of Texas, capitalizing on the gentle warming trends and consistent moisture before the intense summer heat sets in. The exact window, however, shifts significantly as you travel north to south.
- South Texas: In the southernmost reaches of Texas, where winters are mild and spring arrives earliest, gardeners can begin planting as early as late January through February. This early start allows tubers to develop and mature before the oppressive summer temperatures become too stressful for the plants. Areas like the Rio Grande Valley benefit greatly from this extended mild season, providing ample time for an early spring harvest.
- Central Texas: Moving into Central Texas, including major cities like Austin and San Antonio, the ideal window shifts to February through March. The risk of a late frost is still present in February, so monitoring local forecasts is crucial. Planting during this period ensures that potatoes can establish themselves and begin forming tubers during the pleasant spring weather, aiming for a late spring to early summer harvest before the full intensity of July and August sets in.
- North Texas: For gardeners in North Texas, encompassing areas around Dallas and Fort Worth, the planting season typically extends from March into April. This later start accounts for the colder winter temperatures and higher probability of late spring frosts. Waiting until the soil has thoroughly warmed and the threat of freezing temperatures has passed is essential for healthy plant emergence and development. This schedule allows for a summer harvest, often concluding before the peak dog days of summer.
Embracing the Fall Season for a Second Crop
For select regions of Texas, the opportunity for a fall potato crop provides an exciting chance for a second harvest. This is particularly appealing for those looking to extend their gardening season and enjoy fresh potatoes well into the cooler months.
- South and Coastal Texas: The prolonged warmth and relatively mild autumns in South Texas and Coastal Texas make fall planting a viable option. Gardeners in these areas can plant potatoes in August or September. The goal is to allow the plants to establish and grow during the late summer and early fall, with tuber development occurring as temperatures begin to moderate. This timing aims for a harvest in late fall or early winter, often around Thanksgiving or December, providing a fresh crop for holiday meals and cooler weather enjoyment. Selecting varieties that mature relatively quickly can be beneficial for fall plantings.
Laying the Groundwork: Essential Steps for Thriving Potato Plants
Successful potato cultivation goes beyond just perfect timing; it requires meticulous preparation of the growing environment. Understanding and addressing the specific needs of potato plants from the outset will set the stage for a robust and productive yield, aligning with a lifestyle that values quality and self-sufficiency.
Cultivating the Perfect Soil Environment
Potatoes are root vegetables, meaning the quality of your soil is paramount. They thrive in conditions that allow their tubers to expand freely without obstruction.
- Well-Drained and Loose: This is non-negotiable. Heavy clay soils, common in parts of Texas, can compact around developing tubers, stunting their growth and potentially leading to rot. If your soil is heavy, amend it generously with organic matter like compost, well-rotted manure, or peat moss to improve drainage and create a loose, friable texture. Raised beds are an excellent solution for difficult soil conditions, allowing for complete control over the growing medium.
- Slightly Acidic pH: Potatoes prefer a slightly acidic soil with a pH range of 5.0 to 6.0. This acidity helps deter common potato diseases, particularly scab. If your soil pH is too high (alkaline), you can gradually lower it by adding elemental sulfur or peat moss. A soil test is highly recommended before planting to determine your starting pH and nutrient levels.
- Rich in Organic Matter: Organic matter is the backbone of healthy soil. It not only improves soil structure and drainage but also provides a slow-release source of nutrients as it breaks down, fostering a vibrant microbial ecosystem that benefits plant health. Incorporate ample amounts of compost or other organic amendments a few weeks before planting.
Selecting and Preparing Your Seed Potatoes
The foundation of a healthy potato crop begins with the right planting material. Opting for quality seed potatoes is an investment in your harvest.
- Certified Disease-Free: Always purchase certified disease-free seed potatoes from reputable nurseries or garden centers. Grocery store potatoes, while seemingly suitable, may have been treated with sprout inhibitors or could carry diseases that will manifest in your garden. Certified seeds ensure you’re starting with strong, healthy stock.
- Cutting and Curing Larger Seed Potatoes: If your seed potatoes are larger than a chicken egg, you can cut them into pieces. Each piece should be roughly the size of a golf ball and contain at least two “eyes” or sprouts. Use a clean, sharp knife to prevent the spread of any potential pathogens.
- Curing Process: After cutting, allow the seed potato pieces to “cure” for 2-3 days in a warm, humid, well-ventilated area away from direct sunlight. This curing process allows the cut surfaces to form a protective callous, which helps prevent rot once planted in the soil and promotes healthier sprouting.
The Art of Planting: Depth, Spacing, and Sunlight
Once your soil is prepared and your seed potatoes are ready, precise planting techniques will ensure optimal growth and yield.
- Full Sun Exposure: Potatoes are sun-loving plants and require at least 6-8 hours of direct sunlight per day to produce a good harvest. Choose a location in your garden that receives ample sun throughout the growing season.
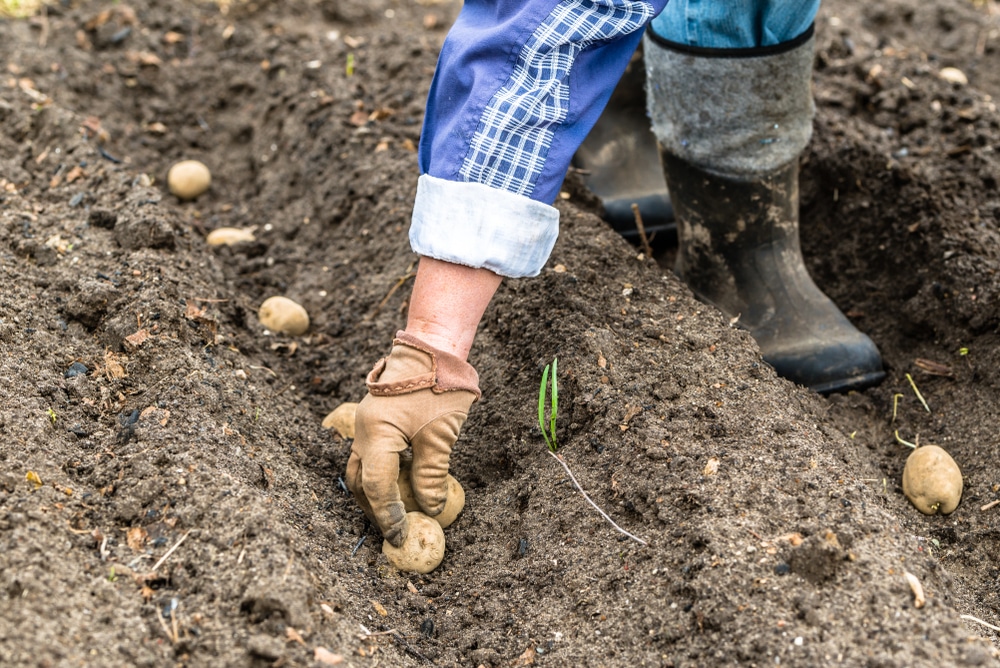
- Planting Depth: Plant your seed potato pieces about 4-6 inches deep. This initial depth provides sufficient protection and encourages vigorous root development.
- Spacing: Proper spacing is crucial for air circulation and tuber development. Space individual potato pieces 10-12 inches apart within the rows. If you’re planting in traditional rows, aim for 3 feet between rows to allow for hilling and easy access for maintenance. For raised beds or intensive gardening, you might space them a bit closer, but ensure adequate room for hilling.
Nurturing Your Crop: From Sprout to Harvest
Once your seed potatoes are in the ground, the real journey begins. Consistent care and attention to the specific needs of your growing plants will ensure that your efforts culminate in a bountiful and delicious harvest, truly embodying the farm-to-table ethos that many modern travelers and locals appreciate.
Watering Wisely for Robust Tuber Development
Water is critical, especially during key growth stages. Overwatering or underwatering can both lead to problems.
- Consistent Moisture is Key: Potatoes need consistent moisture, particularly when the plants begin to flower, as this signals the start of tuber formation. Aim for about 1-2 inches of water per week, either from rainfall or irrigation.
- Avoid Waterlogging: While consistent moisture is important, waterlogged soil can lead to root rot and other fungal diseases. Ensure your well-drained soil preparation pays off, and allow the top inch or two of soil to dry slightly between waterings. Use drip irrigation or soaker hoses to deliver water directly to the root zone, minimizing evaporation and foliar diseases.
Fertilizing for Flavor and Yield
Potatoes are heavy feeders and benefit from targeted nutrient application.
- Balanced Fertilizer: Before planting, work a balanced, slow-release granular fertilizer into the soil. Avoid high-nitrogen fertilizers, especially after the plants have started to grow, as excessive nitrogen promotes leafy growth at the expense of tuber development.
- Phosphorus and Potassium: Focus on fertilizers rich in phosphorus (P) and potassium (K), which are essential for strong root development and tuber formation. These are often represented by the middle and third numbers in an NPK ratio (e.g., 5-10-10 or 8-16-16). A side-dressing with compost or a balanced organic fertilizer once the plants are about 6-8 inches tall can also provide a boost.
The Critical Practice of Hilling
Hilling is perhaps the most unique and essential practice in potato cultivation. It directly impacts your yield and protects your developing tubers.
- What is Hilling? As potato plants grow, new tubers form along the underground stem. Hilling involves mounding soil up around the base of the plant, covering the lower stems.
- Why Hill?
- Protects Tubers from Sunlight: Exposed tubers will turn green and produce solanine, a bitter and toxic compound. Hilling keeps them buried and safe from sunlight.
- Encourages More Tubers: Covering the stems stimulates the plant to produce more tubers higher up along the stem, increasing your overall yield.
- When to Hill? Begin hilling when the plants are about 6-8 inches tall. Continue to hill periodically as the plants grow, leaving only the top few inches of foliage exposed. You may need to hill 2-3 times throughout the growing season.
Vigilance Against Pests and Diseases
Even in the most pristine Texas gardens, pests and diseases can pose a threat. Early detection and proactive management are key.
- Common Pests:
- Colorado potato beetle: These striped beetles and their brick-red larvae can quickly defoliate plants. Hand-picking is effective for small infestations, or consider organic insecticides like neem oil.
- Flea beetles: Tiny, jumping beetles that chew small holes in leaves. Row covers can provide protection for young plants.
- Common Diseases:
- Early blight and late blight: Fungal diseases that cause brown spots on leaves and can affect tubers. Good air circulation, proper spacing, and avoiding overhead watering can help prevent them. Fungicidal sprays may be necessary in severe cases.
- Prevention Strategies:
- Crop Rotation: Never plant potatoes in the same spot year after year. Rotate crops to different areas of your garden for at least 3-4 years to break pest and disease cycles.
- Good Sanitation: Remove and dispose of any diseased plant material promptly. Keep the garden free of weeds, which can harbor pests.
- Resistant Varieties: Choose potato varieties known for their disease resistance when possible.
The Sweet Reward: Harvesting and Storing Your Texas Potatoes
The culmination of your gardening efforts is the joyous moment of harvest. Knowing when and how to dig up your potatoes, and properly prepare them for storage, ensures that you can enjoy your homegrown bounty for months to come. This final stage is deeply satisfying, embodying the sustainability and fresh living celebrated by many in the Texas lifestyle.
Knowing When to Harvest for Peak Flavor
Timing your harvest correctly is crucial for maximizing flavor, texture, and storage life.
- Maturity Period: Most potato varieties mature in 90-120 days from planting.
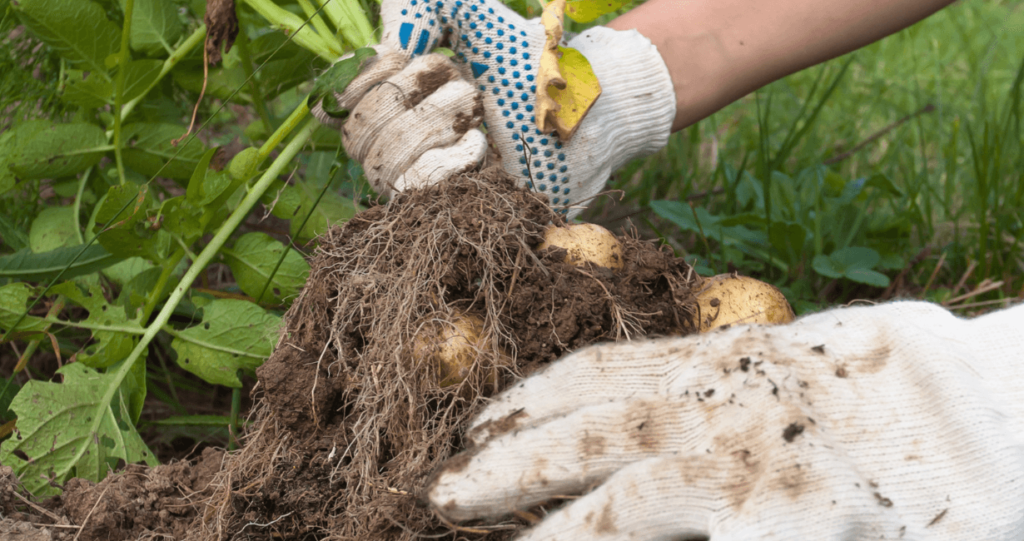
- Foliage Die-Back: The most reliable indicator that your potatoes are ready for harvest is when the plant’s foliage begins to yellow, wither, and die back. This signals that the plant has finished putting its energy into leaf production and has directed it all into plumping up the tubers.
- Waiting Period: Once the foliage has completely died back, wait an additional 1-2 weeks before harvesting. This allows the potato skins to “set” or toughen up, which is vital for good storage.
- New Potatoes: If you’re eager for “new potatoes” – small, tender, thin-skinned potatoes – you can carefully “rob” a few from the edges of the mound about 2-3 weeks after the plants have flowered, while the foliage is still green. Just be gentle and replace the soil afterward.
Curing and Storing Your Bountiful Harvest
Proper curing and storage are essential to extending the life of your homegrown potatoes, allowing you to savor your harvest long after the growing season has ended.
- Harvesting Technique: Dig carefully, starting a foot or so away from the plant stem to avoid piercing the tubers. Use a pitchfork or spade, gently loosening the soil around the plants.
- Initial Curing: After digging, gently brush off excess soil (do not wash them). Lay your potatoes in a single layer in a cool, dark, well-ventilated area with high humidity (e.g., a shed or garage) for 1-2 weeks. This curing period allows any minor cuts to heal and strengthens the skins, significantly improving storage potential.
- Long-Term Storage: After curing, store potatoes in a cool (40-50°F / 4-10°C), dark, and humid place. Bins, burlap sacks, or perforated plastic containers work well for storage, allowing for air circulation. Avoid storing them in direct sunlight or in refrigerators, as cold temperatures can convert starches to sugars, affecting flavor and texture. Do not store potatoes near onions, as gases from onions can accelerate potato sprouting. With proper storage, your Texas potatoes can last for several months.

Discovering Popular Potato Varieties for Texas Gardeners
While many varieties can be grown in Texas, some consistently perform well and offer delicious results. Exploring different varieties adds another layer to the gardening experience, reminiscent of discovering local specialties on a travel adventure.
- Russet: Known for their long, brown, rough skin and starchy flesh, Russet potatoes are excellent for baking, mashing, and making fries. They are a staple in many kitchens.
- Yukon Gold: A popular choice for their thin, yellowish skin and creamy, buttery-yellow flesh. Yukon Gold potatoes are versatile, perfect for roasting, mashing, or boiling, offering a rich flavor.
- Red Pontiac: These red-skinned potatoes have firm, white flesh. They are well-suited for boiling, salads, and roasting, holding their shape well after cooking. Red Pontiac is often praised for its vigorous growth.
- Kennebec: A white-skinned, white-fleshed potato that produces large, uniform tubers. Kennebec is a good all-purpose potato, excellent for frying and chipping due to its high solids content.
Embarking on the journey of planting potatoes in Texas is more than just a gardening task; it’s an enriching lifestyle choice that connects you to the land, the seasons, and the simple pleasures of homegrown food. From the careful timing of your planting in South Texas to the diligent hilling in North Texas, each step brings you closer to a rewarding harvest. Imagine the satisfaction of serving a meal featuring your very own Texas-grown potatoes, a culinary experience that embodies the spirit of local living and sustainable travel, right from your backyard. So, roll up your sleeves, dig into the rich Texas soil, and prepare for a truly delicious adventure!
LifeOutOfTheBox is a participant in the Amazon Services LLC Associates Program, an affiliate advertising program designed to provide a means for sites to earn advertising fees by advertising and linking to Amazon.com. Amazon, the Amazon logo, AmazonSupply, and the AmazonSupply logo are trademarks of Amazon.com, Inc. or its affiliates. As an Amazon Associate we earn affiliate commissions from qualifying purchases.