
The allure of travel often extends beyond breathtaking landscapes and historical landmarks. For many, the true essence of a destination is found in its unique culinary offerings, a vibrant tapestry woven from local ingredients and time-honored traditions. The iconic Boston Cream pie, a delightful dessert that has captured hearts and palates worldwide, is a prime example of how a city’s identity can be inextricably linked to its food. While its name suggests a singular origin, understanding and recreating this classic often involves a journey of discovery, much like planning a trip to Boston itself. This article will guide you through the delightful process of making Boston Cream pie, drawing inspiration from the very spirit of travel, tourism, and the rich cultural experiences that define the places we explore.
The Origins and Enduring Appeal of Boston Cream Pie
Before we delve into the culinary mechanics of crafting a perfect Boston Cream pie, it’s essential to understand its historical context. Contrary to popular belief, this beloved dessert is not a pie in the traditional sense. It is, in fact, a cake, specifically a sponge cake or yellow cake, split and filled with a luscious pastry cream, then enrobed in a rich chocolate glaze. Its story begins in the mid-19th century at the Omni Parker House Hotel in Boston, Massachusetts. The hotel, a landmark in its own right, was a hub of social and culinary innovation. It was there, in 1856, that Mrs. Susanna J. Wilson is credited with creating the dessert, which was initially known as “Chocolate Cream Pie.” The name eventually evolved, and the Omni Parker House Hotel has been proudly serving its signature Boston Cream pie ever since, making it a must-try experience for any visitor to the city.
The enduring appeal of Boston Cream pie lies in its harmonious combination of textures and flavors. The light, airy cake provides a delicate foundation, while the smooth, creamy filling offers a decadent contrast. The glossy chocolate glaze ties everything together with a touch of bittersweet sophistication. It’s a dessert that evokes comfort, celebration, and a sense of indulgence, much like the anticipation of a luxurious getaway or the joy of discovering a hidden gem in a new city. Whether you’re a seasoned baker or a novice in the kitchen, creating Boston Cream pie at home can be a rewarding experience, a delicious way to bring a taste of Boston’s heritage into your own home.
Crafting the Perfect Boston Cream: A Step-by-Step Culinary Expedition
Embarking on the creation of a Boston Cream pie is akin to planning a meticulously organized trip. Each element, from the selection of ingredients to the precise execution of each step, contributes to the overall success of the final product. We’ll break down the process into three essential components: the cake layers, the luscious pastry cream, and the decadent chocolate glaze.
The Foundation: Baking the Golden Cake Layers
The cake is the structural backbone of the Boston Cream pie, and its quality significantly impacts the final taste and texture. A classic Boston Cream pie typically features a tender, slightly sweet yellow cake or sponge cake. The key is to achieve a light and airy crumb that will absorb the filling beautifully without becoming soggy.
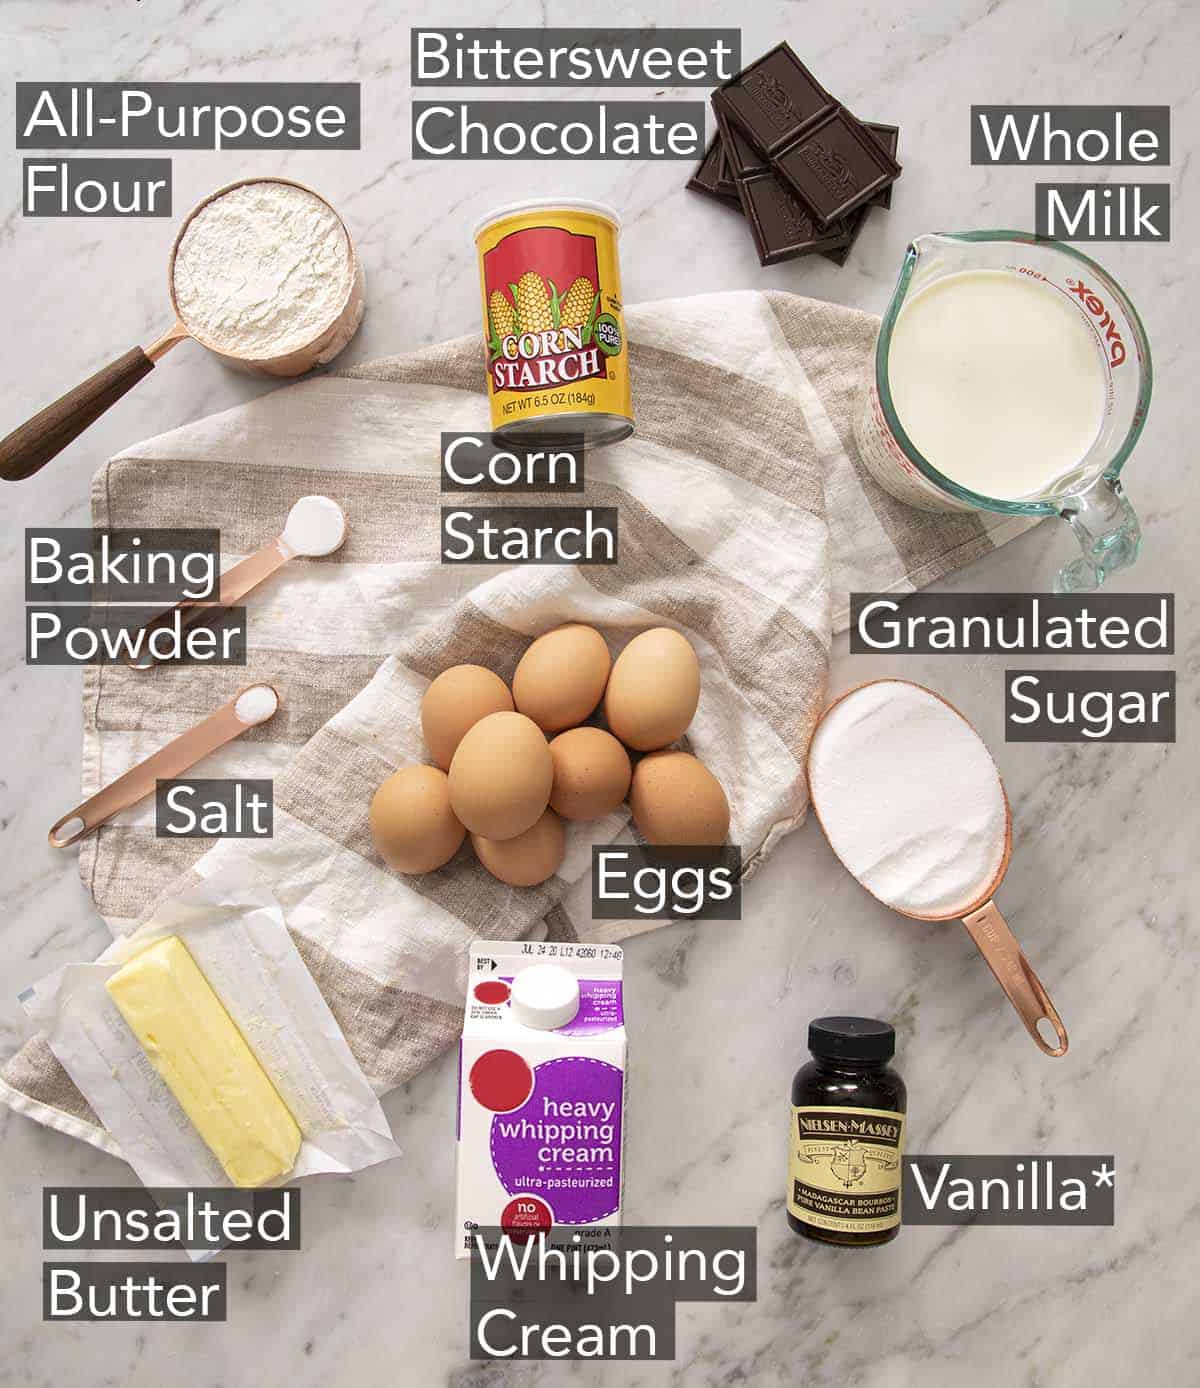
Ingredients:
- 1 ½ cups all-purpose flour
- 1 cup granulated sugar
- 1 ½ teaspoons baking powder
- ½ teaspoon salt
- ½ cup (1 stick) unsalted butter, softened
- 2 large eggs
- ½ cup milk
- 1 teaspoon vanilla extract
Instructions:
- Preheat and Prepare: Preheat your oven to 350°F (175°C). Grease and flour two 8-inch round cake pans, or line them with parchment paper. This ensures the cakes release easily after baking.
- Dry Ingredients: In a large mixing bowl, whisk together the flour, sugar, baking powder, and salt. This initial step ensures even distribution of the leavening agent and salt.
- Creaming the Butter: Add the softened butter to the dry ingredients. Using an electric mixer on medium speed, beat until the mixture resembles coarse crumbs. This process, known as creaming, incorporates air into the butter, contributing to the cake’s lightness.
- Wet Ingredients: In a separate, smaller bowl, whisk together the eggs, milk, and vanilla extract.
- Combining Wet and Dry: Gradually add the wet ingredients to the dry ingredients, mixing on low speed until just combined. Be careful not to overmix, as this can develop the gluten too much and result in a tough cake. A few small lumps are acceptable.
- Baking: Divide the batter evenly between the prepared cake pans. Bake for 25-30 minutes, or until a wooden skewer inserted into the center of the cakes comes out clean. The aroma that fills your kitchen will be a delightful prelude to the finished dessert.
- Cooling: Let the cakes cool in their pans for about 10 minutes before inverting them onto a wire rack to cool completely. This is crucial; attempting to assemble the pie with warm cakes will cause the filling to melt and the structure to compromise.
The Heart of the Dessert: Creating the Silky Pastry Cream
The pastry cream, or “custard” as it’s often called, is the soul of the Boston Cream pie. It should be rich, creamy, and delicately flavored, offering a sweet, smooth counterpoint to the cake. Achieving the perfect consistency requires patience and attention to detail.
Ingredients:

- 2 cups whole milk
- ½ cup granulated sugar
- ¼ cup cornstarch
- 4 large egg yolks
- 2 tablespoons unsalted butter, cut into small pieces
- 1 teaspoon vanilla extract
Instructions:
- Warm the Milk: In a medium saucepan, heat the milk over medium heat until it is steaming but not boiling.
- Whisk Dry Ingredients and Yolks: In a separate medium bowl, whisk together the sugar and cornstarch until well combined. Then, whisk in the egg yolks until the mixture is pale yellow and smooth. This creates a thick paste.
- Temper the Egg Yolks: This is a critical step to prevent the eggs from scrambling. Slowly ladle about half a cup of the hot milk into the egg yolk mixture while whisking continuously. This gently raises the temperature of the yolks.
- Combine and Thicken: Pour the tempered egg yolk mixture back into the saucepan with the remaining hot milk. Whisk constantly over medium-low heat. The mixture will begin to thicken. Continue to cook and whisk for about 2-3 minutes, until the pastry cream is very thick and coats the back of a spoon.
- Enrich and Flavor: Remove the saucepan from the heat. Stir in the butter and vanilla extract until the butter is completely melted and incorporated, making the pastry cream incredibly smooth and glossy.
- Chill: Pour the pastry cream into a clean bowl. Cover the surface directly with plastic wrap, pressing it down to prevent a skin from forming. Refrigerate for at least 2 hours, or until thoroughly chilled and firm. This resting period allows the flavors to meld and the cream to set properly, much like allowing a travel itinerary to settle before embarking.
The Crowning Glory: Preparing the Rich Chocolate Glaze
The chocolate glaze is the final flourish, adding a decadent finish and visual appeal to the Boston Cream pie. A simple yet elegant glaze is all that’s needed to elevate this dessert to its full potential.
Ingredients:
- 1 cup semi-sweet chocolate chips
- ¼ cup unsalted butter
- 2 tablespoons light corn syrup (optional, for shine)
Instructions:
- Melt Ingredients: In a heatproof bowl set over a saucepan of simmering water (a double boiler), combine the chocolate chips, butter, and corn syrup (if using). Ensure the bottom of the bowl does not touch the water.
- Stir Until Smooth: Stir gently and continuously until the chocolate and butter are completely melted and the mixture is smooth and glossy. The aroma of melted chocolate is a delightful sensory experience, reminiscent of exploring local markets.
- Cool Slightly: Remove the bowl from the heat and let the glaze cool for about 5-10 minutes, stirring occasionally. It should be warm and pourable but not so hot that it melts the pastry cream.

Assembling and Presenting Your Culinary Masterpiece
With all components prepared, the final act of assembling the Boston Cream pie is where your culinary creation comes to life, a moment of satisfaction akin to reaching your travel destination.
Assembly:
- Level the Cakes: Once the cakes are completely cool, use a serrated knife to carefully level the tops of each cake layer if they have domed during baking. This ensures a stable base for assembly.
- Fill the Pie: Place one cake layer on your serving plate or cake stand. Evenly spread the chilled pastry cream over the entire surface of this cake layer, reaching close to the edges.
- Add the Top Layer: Carefully place the second cake layer on top of the pastry cream. Gently press down to secure it.
- Glaze the Pie: Pour the slightly cooled chocolate glaze over the top of the assembled pie, allowing it to drip down the sides. Use an offset spatula to gently spread the glaze if needed, ensuring an even coating.
- Set and Serve: Allow the glaze to set for at least 15-20 minutes at room temperature, or you can refrigerate it for a quicker set. For optimal flavor and texture, it’s best to serve the Boston Cream pie at room temperature.
Serving Suggestions and Tips for the Discerning Traveler:
Just as a well-planned itinerary enhances a trip, a few thoughtful touches can elevate your Boston Cream pie experience.
- Presentation: A dusting of powdered sugar on the plate or a few fresh berries can add a visual pop. For a truly authentic experience, consider serving it alongside a scoop of vanilla ice cream, a classic pairing that complements the richness of the pie.
- Storage: Boston Cream pie is best enjoyed within 2-3 days. Due to the pastry cream, it should be stored in the refrigerator.
- Variations: For those who enjoy exploring culinary boundaries, consider experimenting with different types of chocolate for the glaze, such as dark or milk chocolate, to alter the sweetness and intensity. You might also introduce a hint of citrus zest or a splash of liqueur to the pastry cream for a unique twist, much like discovering a local variation of a familiar dish while abroad.
- The Experience: Making Boston Cream pie is more than just baking; it’s an immersion into a culinary tradition. As you prepare each layer, imagine yourself exploring the historic streets of Boston, visiting iconic landmarks like the Freedom Trail or the Boston Public Garden, and savoring the local flavors that make this city so special. The process itself becomes a journey, a delicious exploration that culminates in a truly satisfying reward. Whether you are planning a trip to the historic city or simply indulging your sweet tooth, this recipe offers a delightful way to connect with the charm and heritage of Boston.