
The allure of a perfectly cooked New York strip steak is undeniable. Its rich marbling, robust flavor, and satisfying chew are hallmarks of a truly exceptional cut of beef. However, achieving that coveted tenderness, especially when preparing it in the oven, can sometimes feel like a culinary puzzle. Fortunately, with a methodical approach and an understanding of the science behind steak preparation, you can consistently produce oven-baked New York strip steaks that rival those served in the finest steakhouses. This guide will walk you through the essential steps, from selecting the right cut to the final resting period, ensuring your New York strip steak is exceptionally tender and bursting with flavor.

Selecting the Perfect New York Strip Steak
The journey to a tender steak begins long before it hits the oven. The quality and characteristics of the raw cut play a pivotal role in the final outcome. Understanding what to look for when purchasing your New York strip will set you on the path to success.
The Importance of Cut Quality and Marbling
New York strip steak, also known as Kansas City strip or strip loin, is a premium cut derived from the short loin primal. It’s prized for its balanced flavor and tenderness. When selecting your steak, pay close attention to a few key indicators:
- Thickness: Aim for steaks that are at least 1 to 1.5 inches thick. Thicker cuts are more forgiving and allow for a better sear while keeping the interior at your desired temperature without overcooking. Thinner steaks tend to cook too quickly, making it challenging to achieve both a beautiful crust and a tender, juicy interior.
- Marbling: This refers to the intramuscular fat—the fine flecks of white fat interspersed throughout the red meat. Marbling is crucial for both flavor and tenderness. As the steak cooks, this fat melts, basting the meat from within and contributing to a moist, succulent texture. Look for consistent, even marbling throughout the cut. Steaks with very little marbling may end up dry and less flavorful.
- Color: A good quality New York strip should have a bright, cherry-red color. Avoid steaks that appear dull or have a brownish hue, as this can indicate oxidation or that the meat is not as fresh.
- Grade: While not always readily available to the home cook, beef grades such as USDA Prime, Choice, and Select offer a standardized measure of quality. Prime is the highest grade, known for abundant marbling and superior tenderness. Choice is also excellent, with good marbling. Select is leaner and may require a bit more attention to ensure tenderness. If possible, opt for USDA Prime or Choice for the most tender results.
The Role of Aging
The aging process is another critical factor that contributes significantly to the tenderness of beef. There are two primary types of aging:
- Wet Aging: This is the most common method. Beef is vacuum-sealed in plastic and aged in refrigerated conditions for several days to several weeks. Enzymes naturally present in the meat break down tough connective tissues, increasing tenderness and enhancing flavor.
- Dry Aging: This more traditional and labor-intensive process involves aging beef uncovered in a controlled, low-humidity environment. This allows moisture to evaporate from the meat, concentrating its flavor and further breaking down connective tissues. Dry-aged steaks often have a more intense, nutty, and complex flavor profile and are exceptionally tender.
While you may not always know the specific aging process of the steak you purchase at the grocery store, choosing a reputable butcher or a higher-grade steak often implies a better aging process. If you have the opportunity, exploring cuts from a local butcher shop or a specialty meat market can often yield exceptional results.
Mastering the Oven-Tenderizing Technique
The oven can be a powerful tool for achieving a tender New York strip steak, especially when combined with proper searing techniques. The key is to use the oven to gently cook the interior to your desired doneness after an initial sear, which locks in juices and creates a beautiful crust.
The Reverse Sear Method: A Game Changer
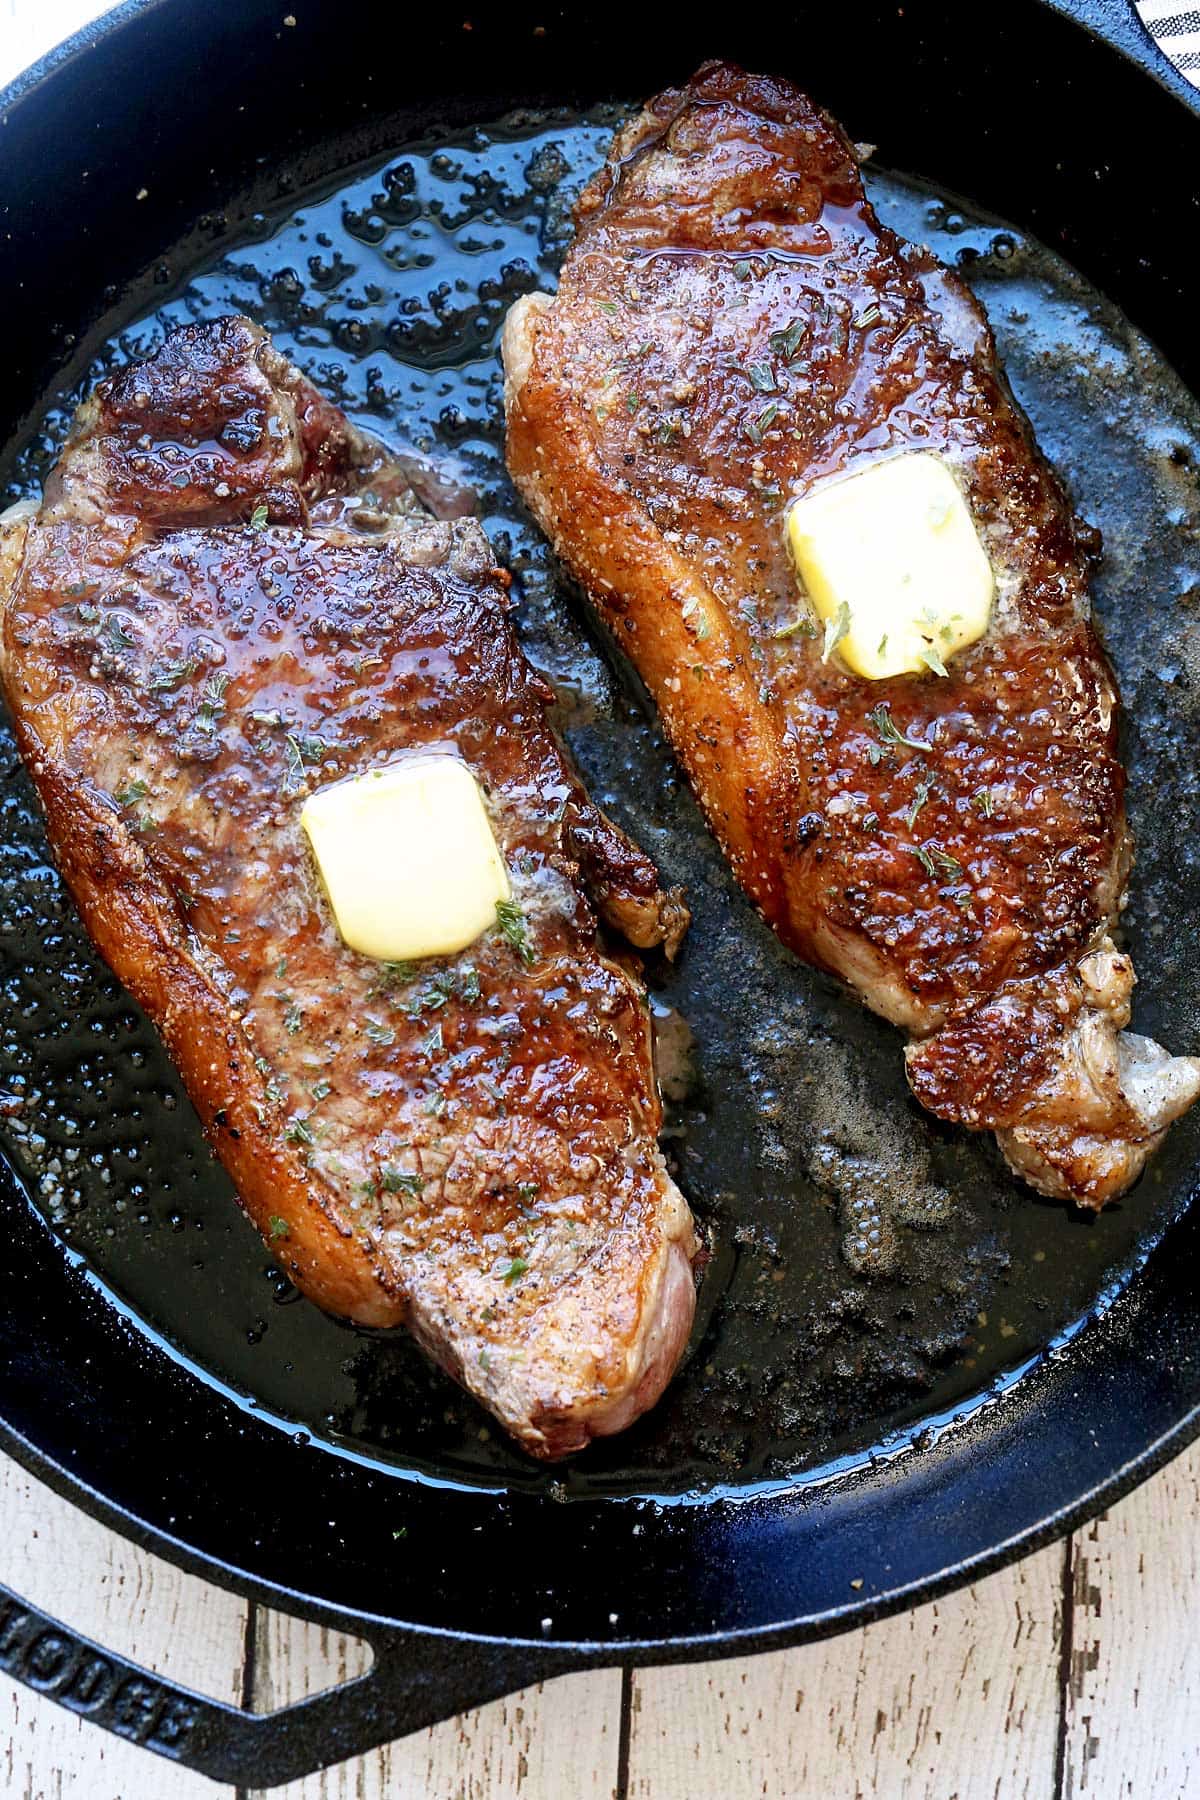
The reverse sear method is widely considered the most effective way to cook a tender, evenly cooked steak in the oven. Instead of searing first and then finishing in the oven, you reverse the order. This allows the steak to cook gently and evenly through to your desired internal temperature before the high-heat sear.
-
Preparation:
- Bring to Room Temperature: Remove the New York strip steak from the refrigerator at least 30 to 60 minutes before cooking. This allows the steak to come closer to room temperature, ensuring more even cooking. A cold steak will cook unevenly, with the exterior overcooking before the interior reaches the desired temperature.
- Pat Dry: Thoroughly pat the steak dry with paper towels. Moisture on the surface will steam the steak rather than allowing it to sear, hindering the development of a flavorful crust.
- Season Generously: Season the steak liberally on all sides with coarse salt (like kosher salt) and freshly ground black pepper. The salt not only adds flavor but also helps to draw out moisture to the surface, which aids in creating a crust, and can even contribute to tenderness by breaking down proteins. Some chefs advocate for salting well in advance, even up to 24 hours before cooking, to allow the salt to penetrate deeper into the meat.
-
Slow Cooking in the Oven:
- Preheat Oven: Preheat your oven to a low temperature, typically between 225°F and 275°F (107°C to 135°C). A lower temperature ensures gentle, even cooking without overcooking the exterior.
- Bake: Place the seasoned steak on a wire rack set inside a baking sheet. This allows air to circulate around the steak, promoting even cooking and preventing it from steaming in its own juices.
- Monitor Temperature: Cook the steak until it reaches about 10-15°F (5-8°C) below your desired final internal temperature. Use a reliable meat thermometer inserted into the thickest part of the steak, avoiding the bone (if applicable) or large pockets of fat. For example, if you desire a medium-rare steak (130-135°F / 54-57°C), aim to pull the steak from the oven when it reaches 115-120°F (46-49°C). Cooking times will vary greatly depending on the thickness of the steak and oven temperature, so relying on temperature is crucial.
The Searing Finale
Once the steak has reached its target pre-sear temperature, it’s time to create that irresistible crust.
- High Heat is Key: Heat a heavy-bottomed skillet, such as cast iron, over high heat. You want the pan to be screaming hot. Add a high smoke-point oil like grapeseed oil, avocado oil, or canola oil. Just a tablespoon or two is usually sufficient.
- Sear Both Sides: Carefully place the steak in the hot skillet. Sear for approximately 60-90 seconds per side, until a deep brown crust forms. The residual heat from the oven cooking will finish cooking the interior to perfection during this searing phase.
- Basting (Optional but Recommended): During the last 30 seconds of searing, you can add a tablespoon or two of butter, a crushed clove of garlic, and a sprig of rosemary or thyme to the pan. Tilt the pan and use a spoon to continuously baste the steak with the melted, infused butter. This adds an incredible layer of flavor and helps develop a gorgeous sheen on the steak.
Essential Post-Cooking Techniques for Ultimate Tenderness
The cooking process isn’t truly finished when the steak comes off the heat. The resting period is a critical, often overlooked, step that significantly impacts the final tenderness and juiciness of your New York strip.
The Crucial Resting Period
- Why Rest? When meat is cooked, the muscle fibers contract, squeezing out moisture. If you cut into a steak immediately after cooking, a significant amount of its juices will be lost onto the cutting board, resulting in a drier, less tender steak. Resting allows the muscle fibers to relax and reabsorb these precious juices, redistributing them throughout the meat.
- How to Rest: Transfer the seared steak to a clean cutting board or a warm plate. Tent it loosely with aluminum foil to keep it warm without steaming.
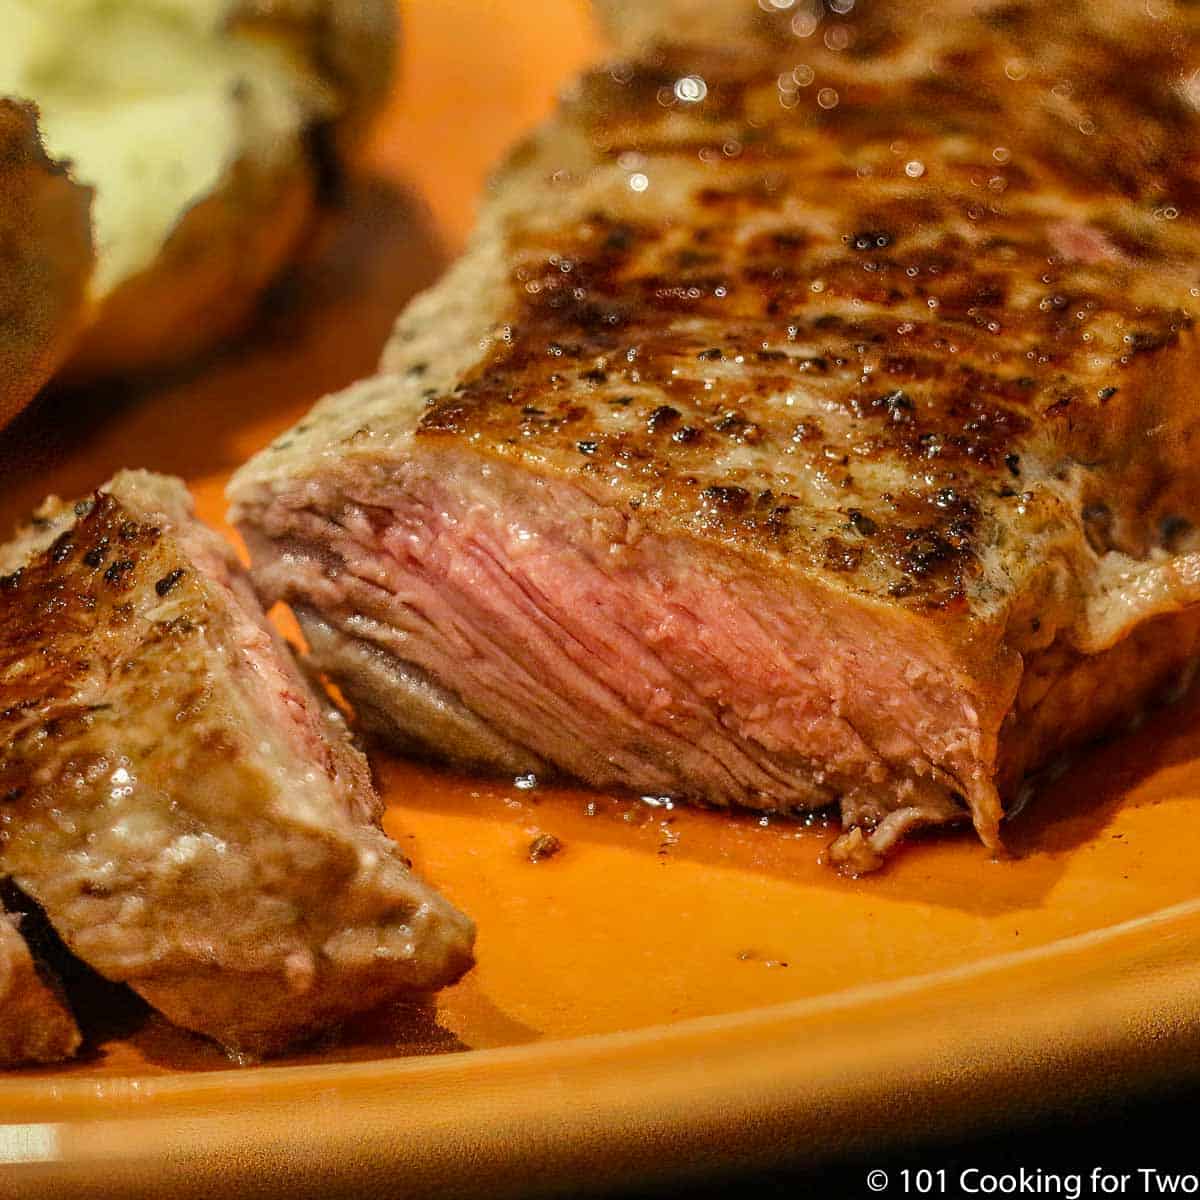
- Duration: Rest the steak for at least 5-10 minutes for thinner cuts, and up to 15-20 minutes for thicker cuts. For a 1-1.5 inch thick New York strip, 10 minutes is generally ideal. The internal temperature of the steak will continue to rise by a few degrees during this time (known as carryover cooking), so factor this into your initial oven temperature target.
Slicing for Maximum Enjoyment
The way you slice your steak can also influence its perceived tenderness.
- Against the Grain: This is the golden rule of slicing steak. Identify the direction of the muscle fibers (the “grain”) running through the steak. Using a sharp knife, slice the steak perpendicular to these fibers. This shortens the muscle fibers, making them easier to chew and thus increasing the perception of tenderness. Slicing with the grain will result in longer, tougher strands of meat that are harder to chew.
- Sharp Knife: Always use a sharp, serrated knife or a very sharp chef’s knife. A dull knife will tear the meat rather than cleanly cut through it, again negatively impacting texture and juiciness.
By meticulously following these steps, from selecting a high-quality cut to understanding the science behind resting and slicing, you can elevate your oven-prepared New York strip steak from good to extraordinary. The reverse sear method, combined with careful temperature monitoring and the essential resting period, is your gateway to achieving consistently tender, flavorful, and restaurant-worthy steaks in the comfort of your own kitchen. Enjoy the delicious results of your culinary endeavor.
LifeOutOfTheBox is a participant in the Amazon Services LLC Associates Program, an affiliate advertising program designed to provide a means for sites to earn advertising fees by advertising and linking to Amazon.com. Amazon, the Amazon logo, AmazonSupply, and the AmazonSupply logo are trademarks of Amazon.com, Inc. or its affiliates. As an Amazon Associate we earn affiliate commissions from qualifying purchases.