There are few culinary experiences as deeply satisfying and universally loved as a perfectly cooked pork shoulder Boston butt roast. This humble cut of meat, when treated with patience and respect, transforms into an incredibly tender, juicy, and flavorful masterpiece, often synonymous with the finest pulled pork dishes found across the United States and beyond. While the name “Boston Butt” might conjure images of an unusual cut, it’s actually the upper part of the pork shoulder, a well-marbled and relatively inexpensive piece of pork that is ideal for slow cooking.
For those who cherish the art of home cooking, mastering the Boston butt roast is a rewarding endeavor that elevates weeknight dinners and weekend gatherings alike. It’s a dish that speaks to comfort, community, and the simple pleasure of good food – a true reflection of the “lifestyle” aspect championed by Life Out of the Box. Whether you’re a seasoned pitmaster with a dedicated smoker in your backyard or a home cook looking to explore new culinary horizons in your apartment kitchen, this comprehensive guide will walk you through everything you need to know to achieve a fall-apart tender, flavor-packed pork shoulder Boston butt roast. From selecting the perfect cut to crafting aromatic rubs and choosing the ideal cooking method, prepare to unlock the secrets to a truly unforgettable meal that might just inspire your next culinary travel adventure.
Understanding Your Boston Butt: The Cut and Its Culinary History
Before diving into the cooking process, it’s essential to understand the star of our show: the Boston butt. This knowledge not only deepens your appreciation for the dish but also provides crucial insights into why certain cooking methods are best suited for this particular cut.
What Exactly is a Boston Butt?
Despite its misleading name, the “Boston butt” isn’t from the rear end of the hog. Instead, it refers to the upper part of the pig’s shoulder, specifically the portion above the picnic ham. This section includes the blade bone and is characterized by a good balance of lean meat, intramuscular fat (marbling), and connective tissue. The marbling is key to the Boston butt’s incredible flavor and tenderness when cooked slowly. As the fat renders and the connective tissues break down, they moisten the meat from within, preventing it from drying out and contributing to that coveted succulent texture.
The origins of the name “Boston butt” are rooted in early American history. In colonial New England, particularly around Boston, butchers would pack less prized cuts of pork into barrels for storage and transport. These barrels were called “butts,” and the practice of packing the shoulder cut into these barrels led to its distinctive name. Over time, the name stuck, and today, it’s universally recognized as the go-to cut for pulled pork across the Southern United States and beyond. Its rich history makes it more than just a piece of meat; it’s a culinary landmark in itself, echoing generations of comfort food traditions.
The Allure of Slow Cooking
The Boston butt’s composition, with its ample connective tissue and marbling, makes it an ideal candidate for low-and-slow cooking methods. Unlike leaner cuts that benefit from quick, high-heat cooking, the Boston butt thrives under extended periods of gentle heat. This prolonged exposure to heat at lower temperatures allows the tough collagen in the connective tissues to slowly break down and convert into gelatin. This gelatin then melts into the meat, basting it from the inside and transforming it into incredibly tender, juicy strands that can be effortlessly “pulled” apart.
Attempting to cook a Boston butt quickly would result in a tough, dry, and unpalatable piece of meat. The magic truly happens when patience is exercised. This slow transformation is not just about tenderness; it’s also about flavor development. The extended cooking time allows the seasonings to deeply penetrate the meat, and for the complex flavors of pork and smoke (if applicable) to meld and intensify, creating a depth that rapid cooking simply cannot achieve. This method embodies a philosophy of cooking that many find akin to the rewarding pace of a well-planned trip, where the journey’s richness unfolds over time, leading to a truly fulfilling destination.
Mastering the Art of Flavor: Rubs, Brines, and Marinades
A great Boston butt roast isn’t just about perfect tenderness; it’s also about a symphony of flavors. The seasonings you choose play a pivotal role in creating a memorable meal, from the simplest salt and pepper to complex spice blends and tangy sauces.
Crafting the Perfect Dry Rub
A dry rub is the cornerstone of flavor for many Boston butt preparations, particularly those inspired by classic American barbecue traditions. A good rub not only seasons the surface but also forms a flavorful crust, known as the “bark,” during cooking. While countless proprietary rubs exist, crafting your own allows for customization to your taste preferences.
A basic dry rub typically includes a combination of salt, sugar (brown sugar is popular for its caramelizing properties), paprika (for color and flavor), black pepper, garlic powder, and onion powder. From there, you can experiment with cayenne pepper for heat, chili powder for depth, cumin for earthiness, or even dried herbs like oregano or thyme.
Regional variations abound across the United States, showcasing the diverse culinary landscape that travelers often seek out. A Memphis-style rub might be sweeter and spicier, while a Carolina-style rub might lean more heavily on black pepper and vinegar-based sauces. For a truly authentic experience, consider drawing inspiration from these iconic barbecue capitals. Whether you’re in Texas, Kansas City, or the Carolinas, each region offers a unique take that can inspire your kitchen experiments, transforming your home cooking into a culinary journey.
A simple starting point for a dry rub:
- 1/4 cup brown sugar
- 2 tablespoons kosher salt
- 2 tablespoons paprika
- 1 tablespoon black pepper
- 1 tablespoon garlic powder
- 1 tablespoon onion powder
- 1 teaspoon cayenne pepper (optional, for heat)
Generously apply the rub all over the Boston butt, pressing it firmly into the meat. For best results, allow the rubbed pork to rest in the refrigerator for at least 4 hours, or ideally overnight, to allow the flavors to penetrate. This resting period is crucial for the rub to draw moisture out, then reabsorb it, creating a flavorful surface.
To Brine or Not to Brine?
While a dry rub is often sufficient, some cooks opt to brine their Boston butt before applying a rub. Brining involves soaking the meat in a saltwater solution, often with added sugars, spices, and aromatics. The primary benefit of brining is to increase the moisture content of the meat, making it even more resistant to drying out during long cooking times, and to infuse it with flavor.
Benefits of Brining:
- Enhanced Moisture: The salt in the brine denatures proteins, allowing the muscle fibers to absorb and retain more liquid, resulting in a juicier final product.
- Improved Flavor: The brine can carry additional flavors deep into the meat, beyond just the surface.
How to Brine:
Prepare a solution of water, salt (about 1 cup of kosher salt per gallon of water), and any desired seasonings (e.g., bay leaves, peppercorns, garlic cloves, brown sugar). Submerge the Boston butt completely in the brine and refrigerate for 12-24 hours. After brining, rinse the pork thoroughly under cold water and pat it completely dry before applying your dry rub. This step ensures that the surface can still form a delicious bark.
While brining can add an extra layer of moisture and flavor, it’s not strictly necessary for a delicious Boston butt, especially if you’re committed to a long, slow cook. Many pitmasters achieve excellent results with just a dry rub and a proper cooking technique. Consider brining if you’re particularly concerned about moisture retention or want to experiment with deeper flavor infusion.
Step-by-Step Cooking Methods for a Fall-Apart Feast
The beauty of the Boston butt is its versatility in cooking methods. Whether you prefer the set-it-and-forget-it convenience of a slow cooker, the controlled environment of an oven, or the authentic smoky flavor of a dedicated smoker, each method promises a tender, delicious outcome.
The Classic Oven Roast: Low and Slow Perfection
The oven is a reliable and accessible tool for achieving a perfectly cooked Boston butt, mimicking many of the benefits of a smoker without the need for specialized equipment. This method is perfect for those who want consistent results with minimal fuss.
Equipment:
- Large roasting pan with a rack
- Meat thermometer
- Aluminum foil
Instructions:
- Prepare the Pork: Generously apply your chosen dry rub to the Boston butt and allow it to rest in the refrigerator for at least 4 hours, or preferably overnight. Let the pork come to room temperature for about an hour before cooking.
- Preheat Oven: Preheat your oven to a low temperature, typically between 225°F (107°C) and 275°F (135°C). A lower temperature will generally result in a more tender product, albeit taking longer.
- Sear (Optional): For an extra layer of flavor and color, you can sear the Boston butt on all sides in a hot, oven-safe skillet before transferring it to the roasting pan. This step is not mandatory but contributes to the “bark.”
- Roast: Place the Boston butt on a rack in a roasting pan. This allows air to circulate and prevents the bottom from getting soggy. Do not add any liquid to the pan at this stage. Roast uncovered for the first few hours to develop a good bark.
- Wrap (Optional, but Recommended): Once the internal temperature reaches around 150-160°F (65-71°C) and a good bark has formed (usually after 4-6 hours), remove the pork from the oven and tightly wrap it in heavy-duty aluminum foil. You can also place it in a disposable aluminum pan and cover it tightly with foil. This wrapping helps to push through the “stall” (where the temperature plateaus) and keeps the meat incredibly moist.
- Continue Cooking: Return the wrapped pork to the oven and continue cooking until it reaches an internal temperature of 200-205°F (93-96°C). This is the “pull temperature” where the collagen has fully broken down. This can take an additional 4-8 hours, depending on the size of the roast and your oven’s consistency.
- Rest: This is perhaps the most crucial step. Once the pork reaches the desired temperature, remove it from the oven (still wrapped) and let it rest on a cutting board for at least 1-2 hours. This resting period allows the juices to redistribute throughout the meat, ensuring maximum tenderness and flavor. For an even better rest, some people place the wrapped pork in an insulated cooler, which acts like a warm oven, allowing it to rest for up to 3-4 hours.
Effortless Slow Cooker Magic
For unparalleled convenience and minimal hands-on time, the slow cooker is an excellent choice for cooking a Boston butt. It’s perfect for busy individuals or for those staying in temporary accommodation like an extended-stay apartment where kitchen appliances might be limited to the basics.
Equipment:
- Large slow cooker (6-8 quarts)
Instructions:
- Prepare the Pork: Apply your dry rub to the Boston butt. You can let it rest in the refrigerator for a few hours if time allows.
- Sear (Optional): While not strictly necessary for a slow cooker, quickly searing the pork on all sides in a hot skillet before placing it in the slow cooker can add a depth of flavor and color.
- Place in Slow Cooker: Place the Boston butt directly into the slow cooker. You can add about 1/2 cup of liquid (chicken broth, apple cider, or even beer) to the bottom of the cooker, though the pork will release plenty of its own juices.
- Cook: Cover the slow cooker and cook on low for 8-10 hours, or on high for 4-6 hours, until the pork is fall-apart tender and an internal temperature of 200-205°F (93-96°C) is reached. The cooking time will vary based on the size of your roast and your specific slow cooker model.
- Rest: Carefully remove the pork from the slow cooker and transfer it to a large cutting board. Tent it loosely with foil and let it rest for at least 20-30 minutes before shredding.
Modern kitchen appliances like the Instant Pot also offer a pressure cooking method that significantly reduces cooking time while still yielding tender results, making it another viable option for a quicker, yet equally delicious, Boston butt.
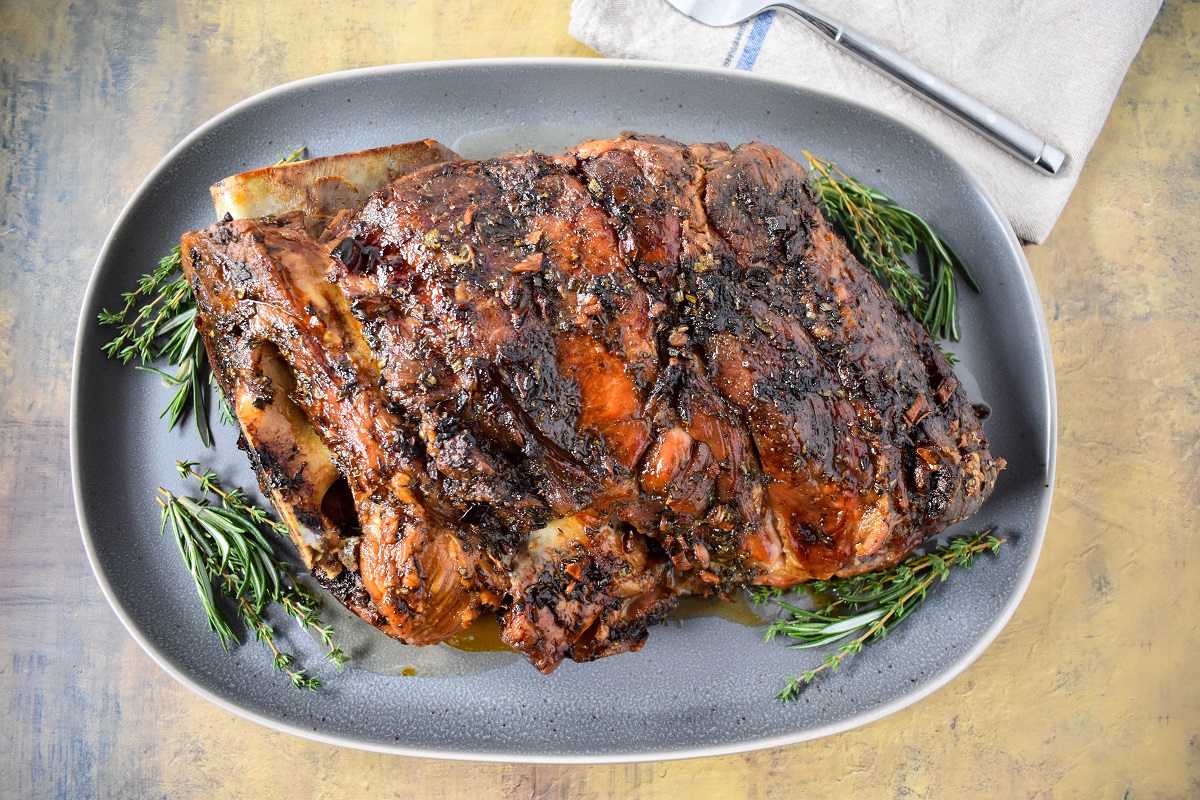
Unlocking Smoky Depths: The Smoker Method
For barbecue enthusiasts and those seeking that quintessential smoky flavor, cooking a Boston butt in a smoker is the ultimate method. This delivers a depth of flavor and a distinct bark that other methods struggle to replicate.
Equipment:
- Smoker (e.g., charcoal, pellet like a Traeger, or offset smoker)
- Wood chips or chunks (hickory, apple, or cherry are popular for pork)
- Meat thermometer (leave-in probe thermometer recommended)
- Foil pan and heavy-duty foil
Instructions (General Outline):
- Prepare Smoker: Prepare your smoker to maintain a consistent temperature of 225-275°F (107-135°C). Add your chosen wood chunks or chips for smoke generation.
- Prepare Pork: Apply your dry rub, allowing ample time for it to penetrate.
- Smoke: Place the Boston butt directly on the smoker grates. Insert a leave-in probe thermometer into the thickest part of the meat, avoiding the bone. Smoke uncovered until the internal temperature reaches 150-160°F (65-71°C) and a beautiful bark has formed. This is often referred to as the “smoke phase” and can take 6-8 hours.
- Wrap (The “Texas Crutch”): Once the bark is set and the desired color is achieved, transfer the pork to an aluminum foil pan or wrap it tightly in several layers of heavy-duty foil. This wrapping helps retain moisture, prevents the bark from getting too dark, and helps push the meat through the temperature “stall.” Some people add a splash of apple cider or broth before wrapping.
- Continue Smoking (or Oven Finishing): Return the wrapped pork to the smoker (or you can transfer it to a preheated oven at the same temperature) and continue cooking until the internal temperature reaches 200-205°F (93-96°C). This can take an additional 4-6 hours. The total cooking time for a typical 8-10 lb Boston butt can be 12-16 hours or even longer.
- Rest: Remove the wrapped pork from the smoker/oven and let it rest, still wrapped, in an insulated cooler or on the counter for at least 1-2 hours, or up to 3-4 hours. This crucial step is what makes the pork incredibly tender and juicy.
Whether you’re exploring the historic landmarks of Europe or indulging in a staycation, the smoker method, much like a grand adventure, demands patience and precision, promising an extraordinary reward. Many grilling aficionados also use their Weber kettle grills with indirect heat setups to achieve similar smoky results, proving that exceptional barbecue can be made with various equipment.
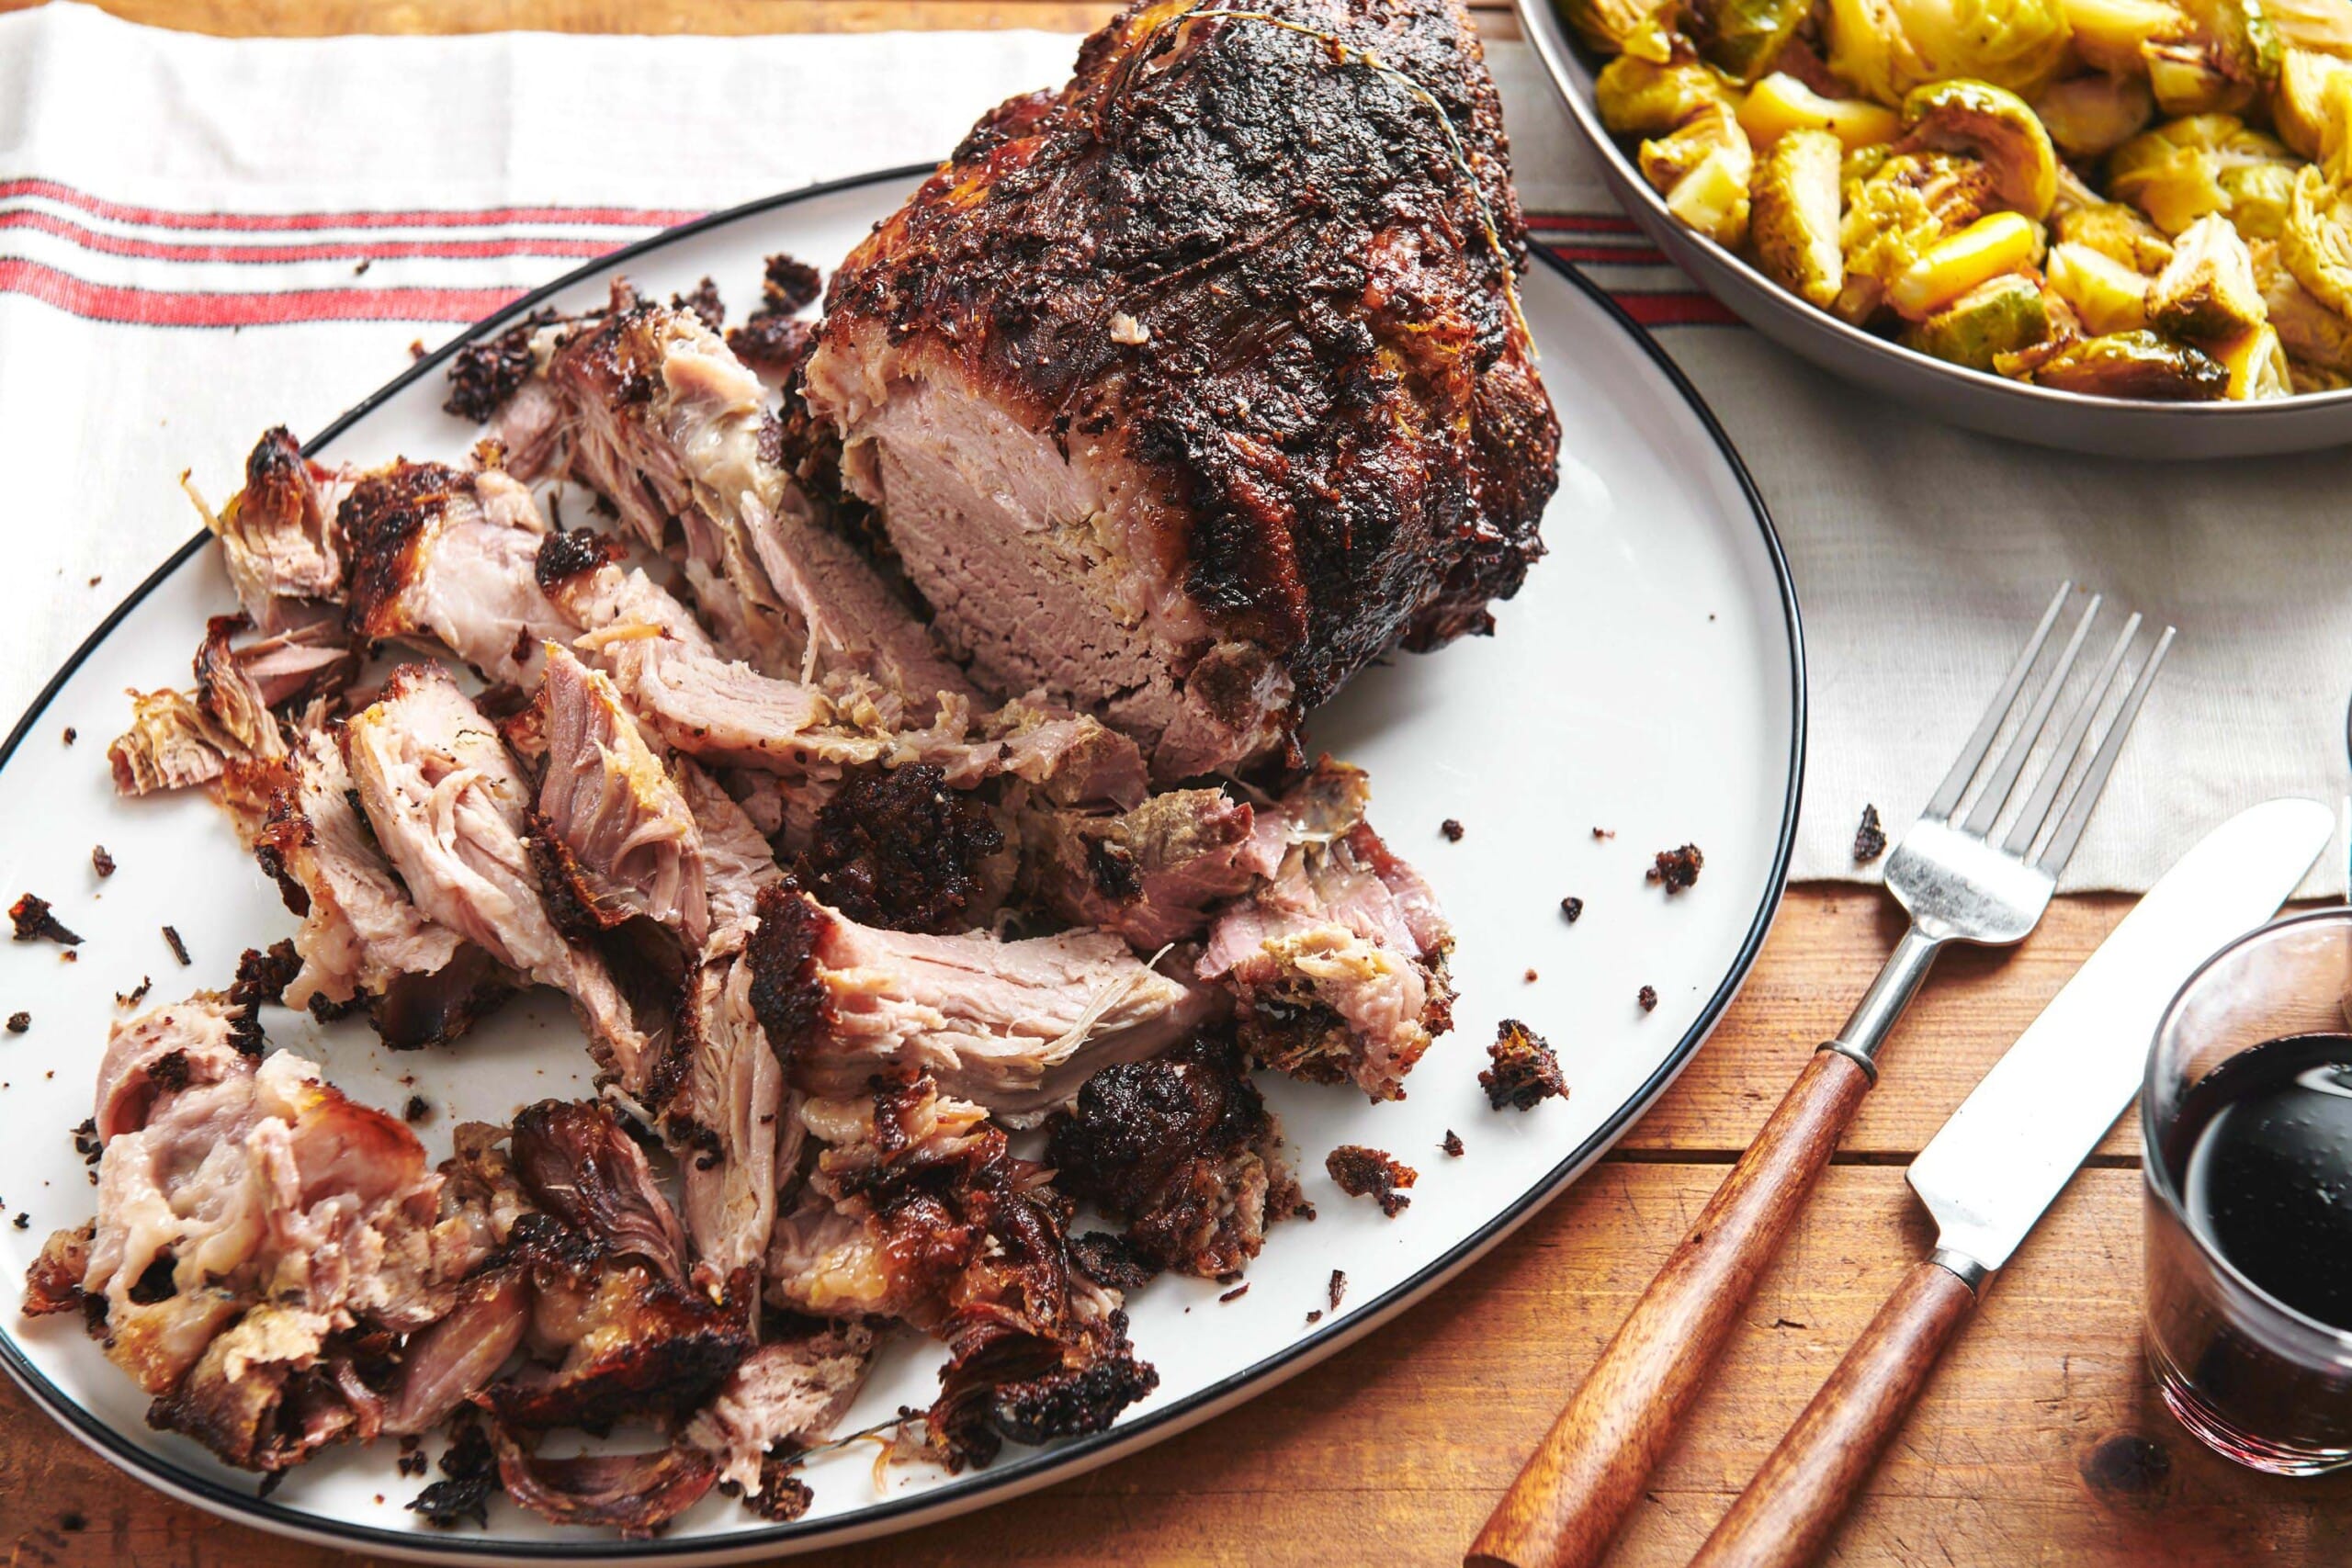
Achieving Pulled Pork Perfection and Serving Suggestions
Once your Boston butt has been patiently cooked and properly rested, the final steps involve shredding it into succulent pulled pork and deciding how to best showcase its incredible flavor.
The Art of Shredding and Resting
After the extensive cooking and resting, the pork should be incredibly tender and almost falling apart. To shred it:
- Unwrap: Carefully unwrap the pork, being mindful of the hot juices collected in the foil or pan. Reserve these juices; they are packed with flavor and can be used to moisten the pulled pork later.
- Remove Bone and Fat: The blade bone should slide out effortlessly. Discard any large pieces of rendered fat that haven’t broken down, though some smaller, soft fatty bits can be mixed in for extra flavor and moisture.
- Shred: Using two forks, bear claws, or even your clean hands (once it’s cool enough to handle), begin pulling the meat apart. It should shred easily into tender strands.
- Moisten: Once shredded, return the pork to the pan with the reserved cooking juices. Toss to coat the meat evenly. You can also add a splash of apple cider vinegar, a favorite barbecue sauce, or some chicken broth to further moisten and flavor the pork.
The goal is to have moist, tender, and flavorful pulled pork that holds together but is easy to eat.

Global Flavors: Serving Your Roast
Pulled pork is incredibly versatile and can be served in a myriad of ways, moving beyond the traditional barbecue sandwich. Its mild yet rich flavor profile makes it adaptable to various culinary traditions, reflecting the diverse food tourism experiences available worldwide.
- Classic BBQ Sandwiches: The quintessential way to enjoy pulled pork. Serve on soft buns with your favorite barbecue sauce, coleslaw, and pickles. Regional preferences dictate the sauce: tangy and vinegary in the Carolinas, sweet and smoky in Kansas City, or thick and rich in Memphis.
- Tacos and Nachos: Embrace international flavors by transforming your pulled pork into delicious Mexican-inspired dishes. Serve in warm tortillas with salsa, guacamole, cilantro, and pickled onions, or layer it over nachos with cheese and jalapeños.
- Pulled Pork Bowls: A healthier and often more colorful option. Serve over rice, quinoa, or cauliflower rice with roasted vegetables, black beans, corn, and a drizzle of a light dressing or hot sauce.
- Asian-Inspired Dishes: Pulled pork can also be infused with Asian flavors. Shred the pork, then toss it with a sauce made from soy sauce, ginger, garlic, sesame oil, and a touch of honey. Serve in bao buns, lettuce wraps, or over noodles.
- Loaded Baked Potatoes: Top a fluffy baked potato with pulled pork, cheese, sour cream, and chives for a hearty and satisfying meal.
No matter how you choose to serve it, a perfectly cooked Boston butt roast is a testament to the rewards of slow cooking and a centerpiece for any gathering. It’s a dish that brings people together, fostering shared experiences much like discovering a new destination or enjoying the amenities of a luxurious resort.
In conclusion, cooking a pork shoulder Boston butt roast is more than just following a recipe; it’s an immersive culinary experience that celebrates patience, flavor, and the joy of creating something truly delicious from scratch. Whether you’re a novice or an experienced chef, embracing the low-and-slow philosophy will yield a result that is tender, juicy, and packed with flavor, leaving a lasting impression on your palate and making your home kitchen a destination in itself. Enjoy the journey from raw cut to succulent pulled pork, and savor every bite of this American classic.
LifeOutOfTheBox is a participant in the Amazon Services LLC Associates Program, an affiliate advertising program designed to provide a means for sites to earn advertising fees by advertising and linking to Amazon.com. Amazon, the Amazon logo, AmazonSupply, and the AmazonSupply logo are trademarks of Amazon.com, Inc. or its affiliates. As an Amazon Associate we earn affiliate commissions from qualifying purchases.