
The allure of a perfectly cooked New York steak, seared to a beautiful crust while remaining tender and juicy within, is a culinary experience that transcends borders and brings a touch of New York City’s vibrant dining scene into your own home. While often associated with high-end steakhouses, mastering this classic dish in a pan is an accessible skill for any home cook looking to elevate their repertoire. This guide delves into the nuances of pan-searing a New York steak, transforming a quality cut of beef into a restaurant-worthy masterpiece, perfect for a special occasion or simply a delightful weeknight indulgence.
Selecting the Perfect Cut
The foundation of an exceptional New York steak lies in the quality of the meat itself. A well-chosen cut will significantly impact the flavor, texture, and overall success of your dish.
Understanding the New York Strip
Also known as the strip steak, Kansas City strip, or even a sirloin in some regions, the New York steak is a premium cut that comes from the short loin primal. It’s characterized by its firm texture, robust beefy flavor, and a distinctive strip of fat along one edge. This marbling, the intramuscular fat, is crucial as it melts during cooking, basting the meat from within and contributing to its succulence and rich taste.
What to Look For at the Butcher
When selecting your New York steak, several visual cues will guide you towards the best choice:
- Thickness: Aim for a steak that is at least 1 to 1.5 inches thick. Thicker cuts are more forgiving during the cooking process, allowing you to achieve a beautiful sear on the exterior without overcooking the interior. Thin steaks are prone to becoming tough and dry.
- Marbling: Look for even distribution of fine, white flecks of fat throughout the muscle. This indicates good marbling, which is essential for flavor and tenderness. Avoid steaks with large, thick chunks of fat or no visible marbling at all.
- Color: The meat should have a bright, cherry-red color. A slightly purplish hue is acceptable, as it simply indicates a lack of oxygen exposure. Avoid steaks that appear dull, brown, or have a greyish tint, as these may be older or have been improperly stored.
- Grain: Observe the direction of the muscle fibers. You want to cook the steak with the grain, and then slice against it for maximum tenderness. While this is more relevant for serving, it’s a good detail to be aware of when making your selection.
- Grade: For the best results, opt for USDA Prime or Choice grades. USDA Prime has the most marbling and is the most tender and flavorful. USDA Choice is still an excellent option, offering a good balance of quality and value.
The Art of Pan-Searing
Pan-searing is a high-heat cooking method that creates a flavorful crust on the exterior of the steak while cooking the interior to your desired level of doneness. It’s a technique that requires precision and attention to detail.
Essential Equipment
Before you begin, ensure you have the right tools at your disposal:
- Heavy-Bottomed Pan: A cast-iron skillet is the gold standard for searing steaks. Its ability to retain and distribute heat evenly is unparalleled, creating a consistent, beautiful crust. A heavy stainless steel pan can also work effectively. Avoid non-stick pans, as they typically cannot achieve the high temperatures required for proper searing.
- Tongs: Sturdy, heat-resistant tongs are essential for safely flipping and handling the steak without puncturing the meat, which would allow precious juices to escape.
- Instant-Read Thermometer: This is arguably the most important tool for ensuring your steak is cooked to perfection. It allows for precise temperature checks without guesswork.
- Spatula: A thin, flexible metal spatula can be useful for gently lifting the steak to check the sear or to maneuver it in the pan.
The Seasoning Ritual
The preparation of the steak before it hits the heat is just as crucial as the cooking itself.
1. Bringing to Room Temperature
Remove your New York steak from the refrigerator at least 30 to 60 minutes before cooking. This allows the steak to come to room temperature. A cold steak will cook unevenly, with the exterior potentially overcooking before the interior reaches the desired temperature.
2. Drying is Key
Pat the steak thoroughly dry with paper towels on all sides. Moisture is the enemy of a good sear. A dry surface allows the Maillard reaction, the chemical process responsible for browning and developing complex flavors, to occur efficiently.
3. Generous Seasoning
Season the steak liberally with coarse sea salt and freshly ground black pepper just before cooking. The salt draws out some moisture, which then reabsorbs, seasoning the meat deeply. Don’t be shy with the seasoning; much of it will fall off during cooking. Some chefs advocate salting the steak an hour or more in advance, allowing the salt to penetrate deeper, but for pan-searing, a last-minute generous application is perfectly effective.
Mastering the Sear
The high heat of the pan is what transforms a raw piece of beef into a culinary delight. This stage demands focus and a sense of timing.

The Heating Process
Place your chosen heavy-bottomed pan over medium-high to high heat. Allow the pan to get thoroughly hot – you should feel the heat radiating from it. Add a high smoke point oil, such as canola, grapeseed, or avocado oil. You want just enough oil to coat the bottom of the pan lightly. Swirl the pan to distribute the oil. You’ll know the pan is ready when the oil shimmers and you see wisps of smoke.
The Sear
Carefully lay the seasoned steak into the hot pan, laying it away from you to avoid oil splatters. You should hear an immediate, satisfying sizzle. Resist the urge to move the steak for the first 2-3 minutes. This allows the crust to develop properly.
Flipping and Basting
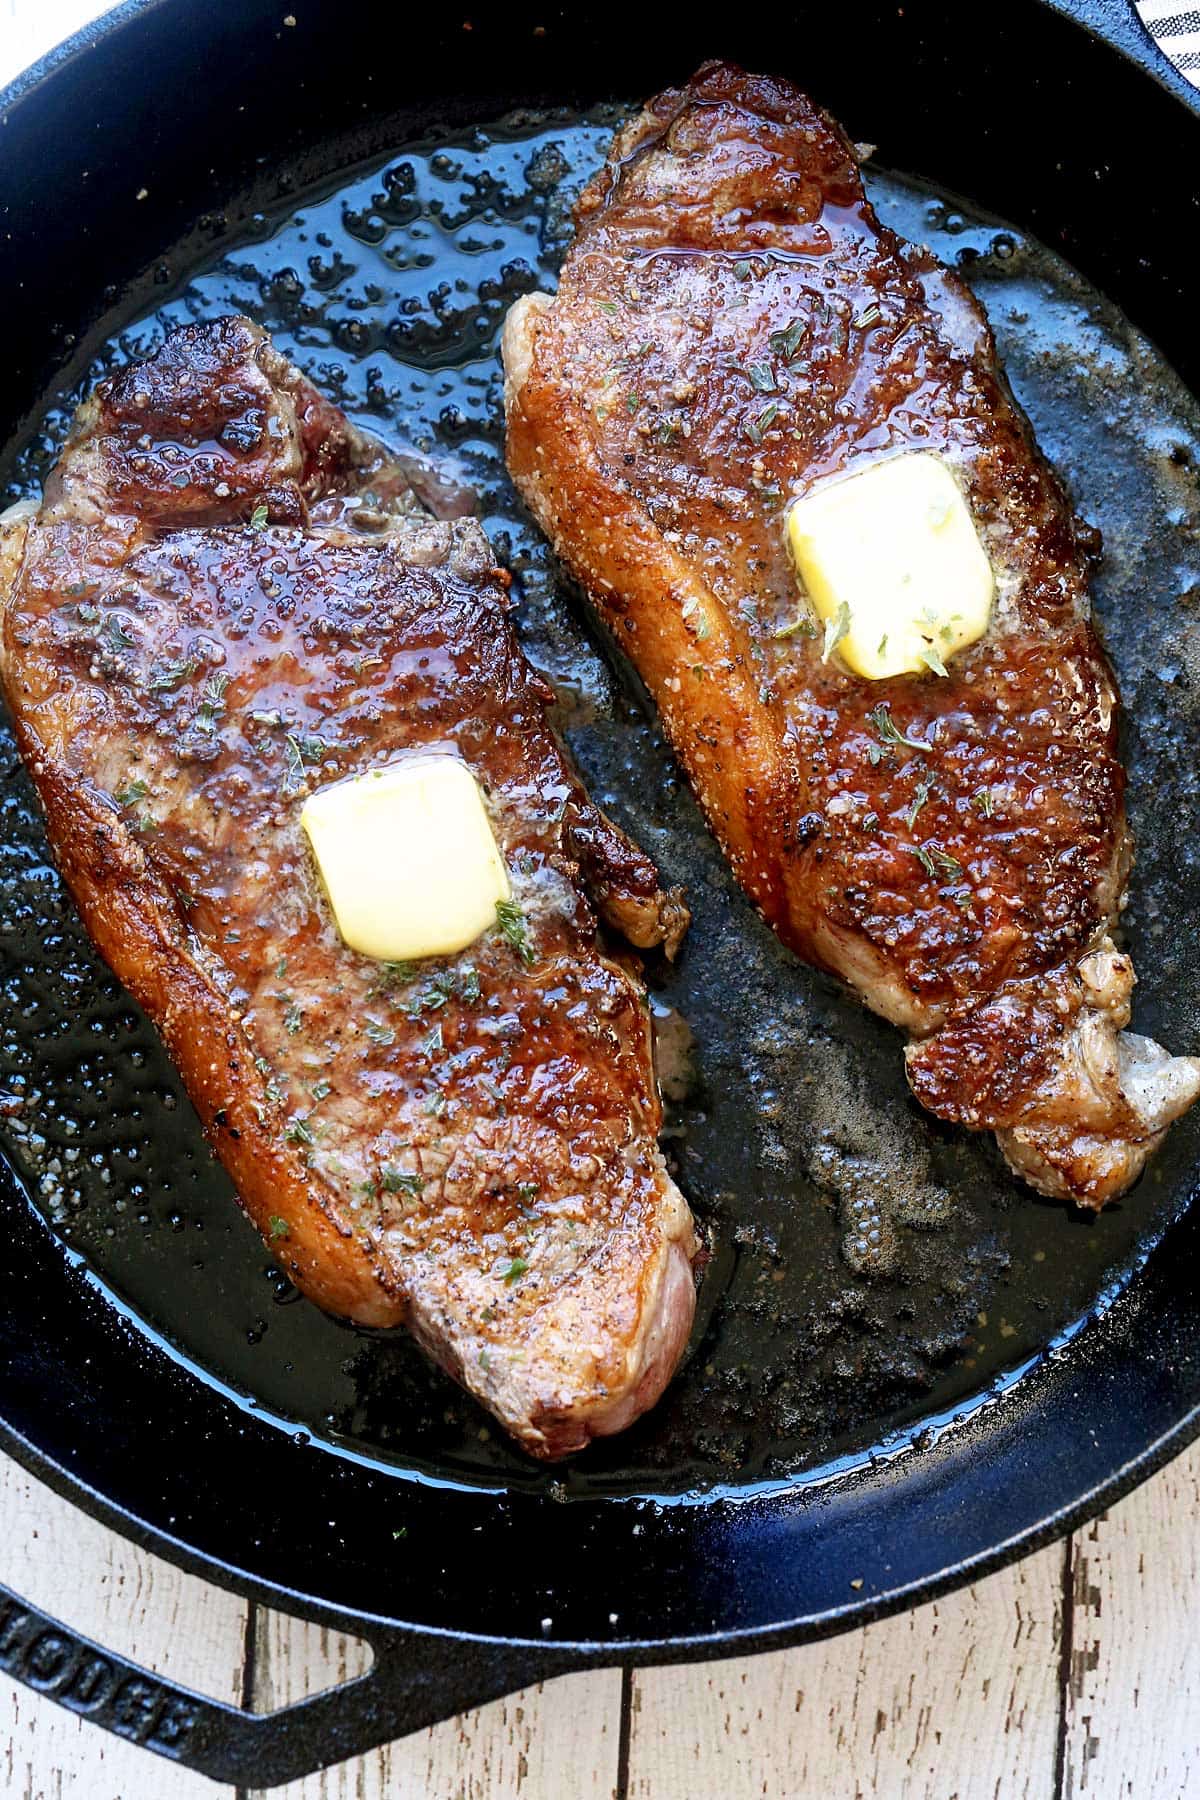
After the initial sear, use your tongs to flip the steak. Sear the other side for another 2-3 minutes, again, without disturbing it unnecessarily. Now, if you are using butter, add a generous knob of unsalted butter to the pan along with aromatics like crushed garlic cloves and fresh rosemary or thyme sprigs.
Butter Basting
As the butter melts, tilt the pan slightly and use a spoon to continuously baste the steak with the foaming butter and aromatics. Spoon the melted butter over the top of the steak, allowing the flavors to infuse and the crust to deepen. Continue basting and flipping the steak every minute or so for even cooking.
Achieving Perfect Doneness
The final stage is to ensure your steak is cooked to your preferred level of doneness, which is best determined by internal temperature.
Internal Temperature Guide
Insert your instant-read thermometer into the thickest part of the steak, avoiding any bone or fat pockets.
- Rare: 120-125°F (49-52°C) – Cool red center.
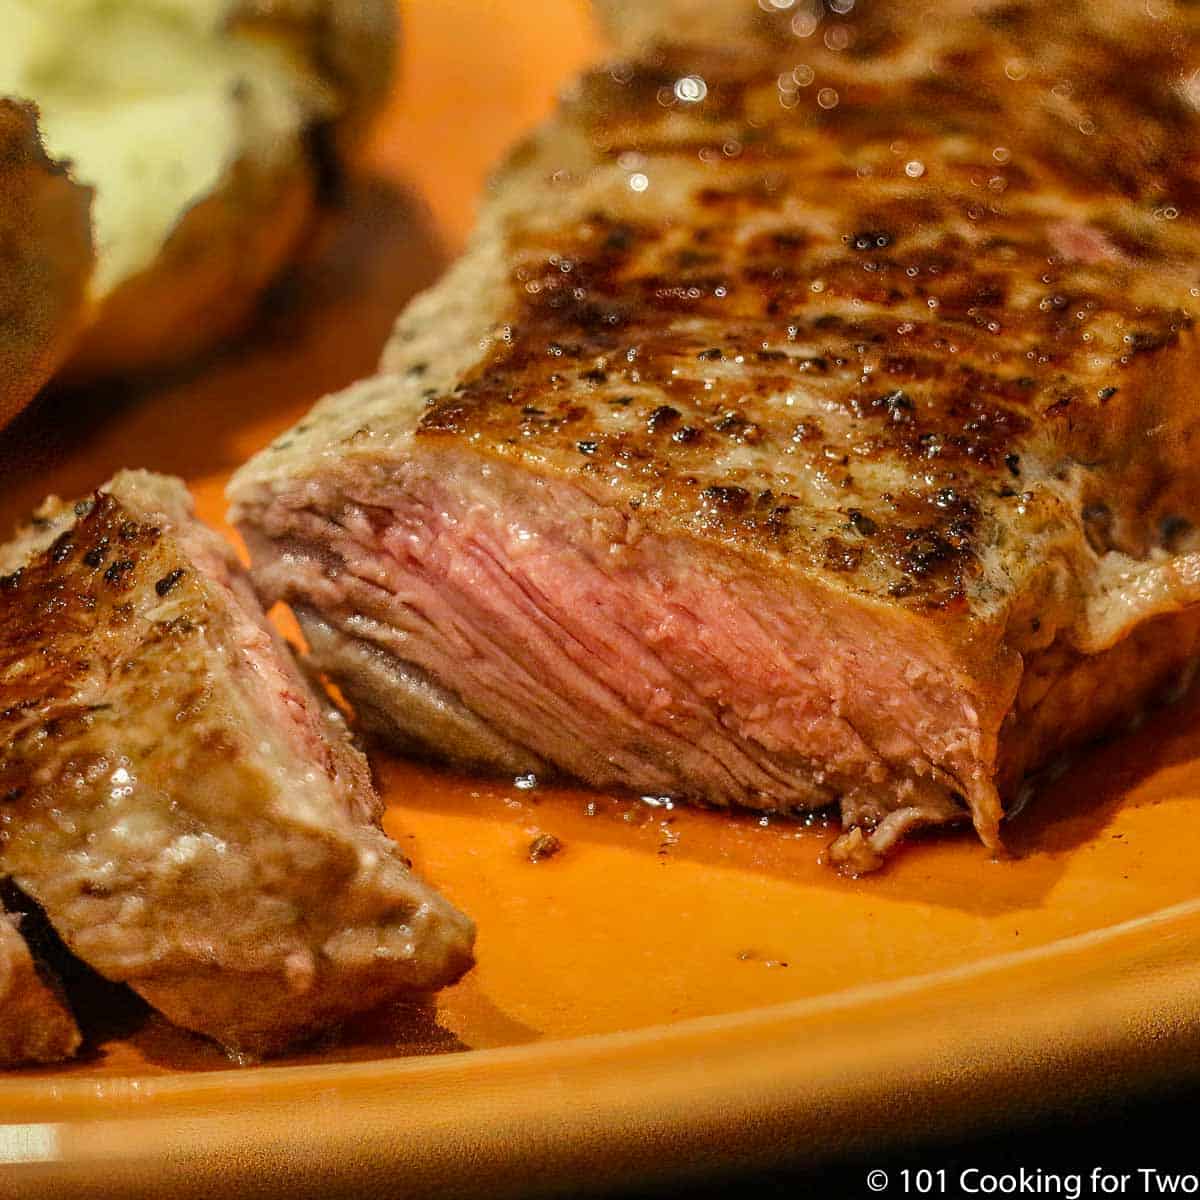
- Medium-Rare: 130-135°F (54-57°C) – Warm red center. This is often considered the ideal doneness for a New York steak, allowing its natural flavors and tenderness to shine.
- Medium: 135-140°F (57-60°C) – Warm pink center.
- Medium-Well: 140-145°F (60-63°C) – Slightly pink center.
- Well-Done: 150°F+ (65°C+) – Little to no pink. (Note: This is generally not recommended for a premium cut like a New York steak, as it can lead to dryness and toughness).
Remember that the steak’s temperature will continue to rise by 5-10 degrees Fahrenheit as it rests, a process known as carryover cooking. So, remove the steak from the pan when it is about 5 degrees Fahrenheit below your target temperature.
The Crucial Resting Period
Once the steak reaches your desired temperature, transfer it to a clean cutting board or a warm plate. Tent it loosely with aluminum foil and let it rest for at least 5 to 10 minutes. This resting period is non-negotiable. It allows the juices, which have been driven to the center of the steak during cooking, to redistribute throughout the meat. Cutting into the steak too soon will result in all those delicious juices running out onto the board, leaving you with a dry steak.
Serving Your Masterpiece
After its well-deserved rest, your perfectly pan-seared New York steak is ready to be enjoyed.
Slicing and Presentation
For the best texture, slice the steak against the grain. You can either serve the entire steak whole, allowing diners to slice their own portions, or pre-slice it into thick, manageable pieces. The beautiful crust, the vibrant pink interior, and the rich aroma will be a testament to your culinary skill.
Accompaniments
A perfectly cooked New York steak is a star in its own right, but it pairs wonderfully with classic steakhouse sides. Consider:
- Mashed Potatoes: Creamy, buttery mashed potatoes are a timeless complement.
- Asparagus: Lightly blanched or pan-fried asparagus with a lemon zest adds a fresh counterpoint.
- Sautéed Mushrooms: Earthy, savory sautéed mushrooms, perhaps cooked in the same pan after the steak, enhance the beefy flavors.
- A Simple Green Salad: A crisp salad with a light vinaigrette offers a refreshing contrast.
Pan-searing a New York steak at home is a rewarding culinary endeavor. With careful selection of the meat, precise execution of the searing technique, and an understanding of temperature control, you can consistently produce a steak that rivals those served in the finest establishments. Enjoy the process, savor the aroma, and delight in the exceptional taste of your expertly cooked New York steak.
LifeOutOfTheBox is a participant in the Amazon Services LLC Associates Program, an affiliate advertising program designed to provide a means for sites to earn advertising fees by advertising and linking to Amazon.com. Amazon, the Amazon logo, AmazonSupply, and the AmazonSupply logo are trademarks of Amazon.com, Inc. or its affiliates. As an Amazon Associate we earn affiliate commissions from qualifying purchases.