
Mastering the art of cooking a New York strip steak in the oven is a cornerstone of elevated home dining, especially for those who appreciate the finer aspects of culinary experiences while traveling or enjoying a staycation. This guide delves into the nuances of achieving a perfectly cooked steak, from selecting the finest cuts to understanding the critical role of oven temperature and timing. For travelers seeking authentic local flavors or those indulging in luxury hotel stays, a well-prepared New York strip can be a memorable culinary highlight.
Selecting the Perfect New York Strip
The foundation of an exceptional New York strip steak lies in its quality. When seeking out this prime cut, whether at a local butcher shop in New Orleans or a specialty market near your resort in Aspen, several factors contribute to its superiority.

Understanding the Cut
The New York strip, also known as the Kansas City strip, strip loin, or sirloin, is a tender, flavorful steak cut from the short loin of the cow. It’s characterized by its marbling – the intramuscular fat that melts during cooking, infusing the meat with moisture and rich flavor. A well-marbled strip steak promises a juicy and tender outcome.
Grade Matters
For the best results, opt for USDA Prime or Choice grades.
- USDA Prime: This is the highest grade, indicating the most marbling, which translates to superior flavor, tenderness, and juiciness. It’s often found in high-end restaurants and gourmet food stores.
- USDA Choice: Still an excellent option, Choice grade has less marbling than Prime but offers a good balance of tenderness and flavor at a more accessible price point. It’s a popular choice for home cooks and can be found in most reputable supermarkets.
- USDA Select: While edible, Select grade has minimal marbling and can be less tender and flavorful. It’s generally not recommended for achieving the best oven-cooked New York strip experience.
Thickness and Weight
The ideal thickness for an oven-cooked New York strip is between 1 to 1.5 inches. Thicker steaks are more forgiving, allowing for a wider window to achieve desired doneness without overcooking. Steaks thinner than an inch can easily become overcooked before developing a proper sear. For weight, a standard portion is usually between 10-16 ounces per steak, offering a satisfying meal.
Appearance
Look for a steak with a bright red color, indicating freshness. Avoid steaks that appear dull or have a brownish hue. The fat cap along one edge should be firm and creamy white, not yellow or brittle.
The Oven-Cooking Method: A Two-Stage Approach
The most effective method for cooking a New York strip steak in the oven involves a two-stage process: searing for a flavorful crust and then finishing in the oven for even cooking. This technique, popular in professional kitchens and often a secret weapon for hotel chefs, ensures a beautiful crust and a perfectly cooked interior, regardless of your chosen cooking environment, be it a bustling city apartment in Paris or a secluded villa in Tuscany.
Stage 1: The Sear
Searing is crucial for developing the Maillard reaction, which creates that deeply savory, brown crust and enhances the steak’s overall flavor profile.
Equipment Needed:
- A heavy, oven-safe skillet, preferably cast iron. Cast iron retains heat exceptionally well, providing an even and intense sear.
- High smoke point oil (e.g., avocado oil, grapeseed oil, or canola oil).
- Salt and freshly ground black pepper.
The Searing Process:
- Pat Dry: Thoroughly pat the steak dry with paper towels. Moisture is the enemy of a good sear; it steams the steak rather than searing it.
- Season Generously: Season both sides of the steak liberally with salt and freshly ground black pepper just before cooking.
- Preheat Skillet: Place your oven-safe skillet over medium-high to high heat. Allow it to get smoking hot.
- Add Oil: Add about 1-2 tablespoons of oil to the hot skillet. It should shimmer and appear to be on the verge of smoking.
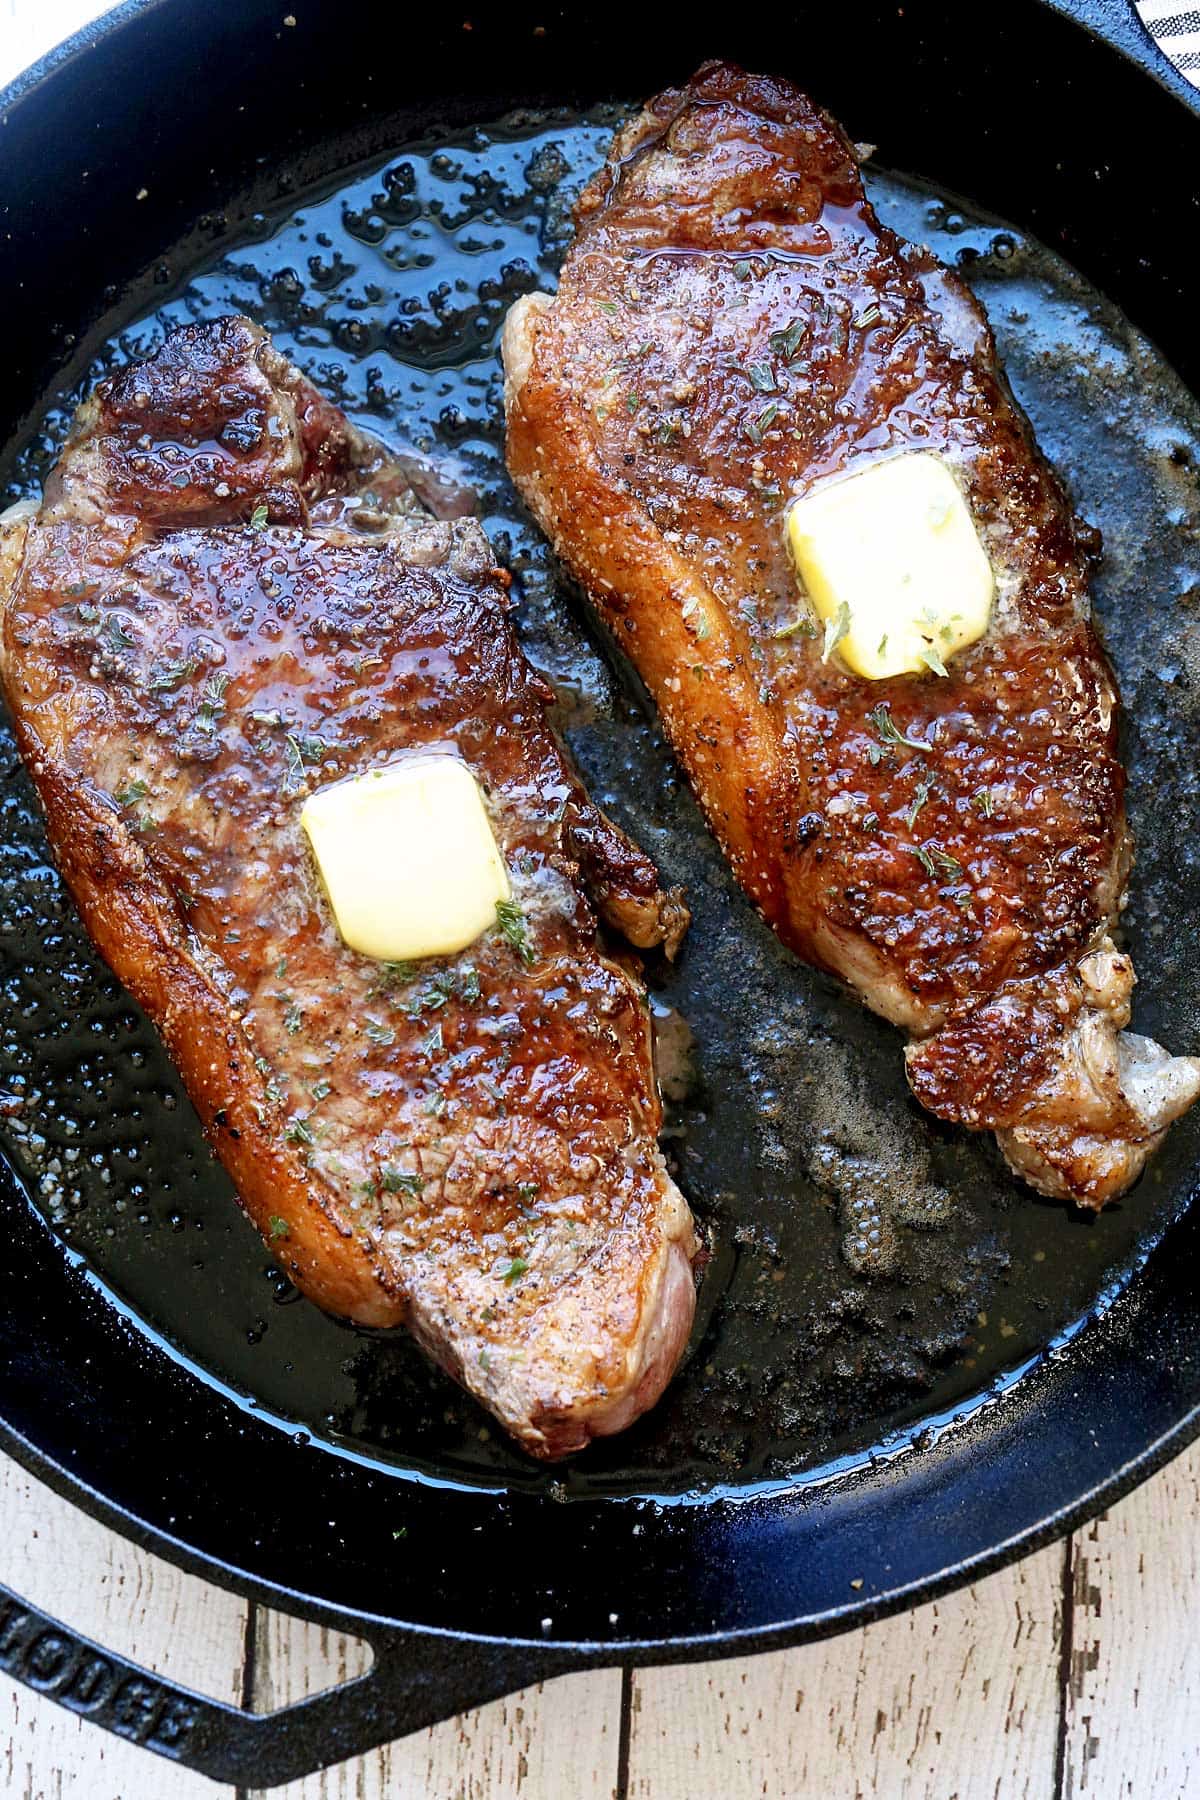
- Sear the Steak: Carefully place the seasoned steak into the hot skillet. Sear for 2-3 minutes per side, undisturbed, until a deep brown crust forms. For a thicker steak, you can also sear the edges for about 30 seconds each.
- Optional Aromatics: During the last minute of searing, you can add aromatics like crushed garlic cloves, sprigs of rosemary or thyme, and a tablespoon of butter to the pan. Baste the steak with the melted butter and aromatics for added flavor.
Stage 2: The Oven Finish
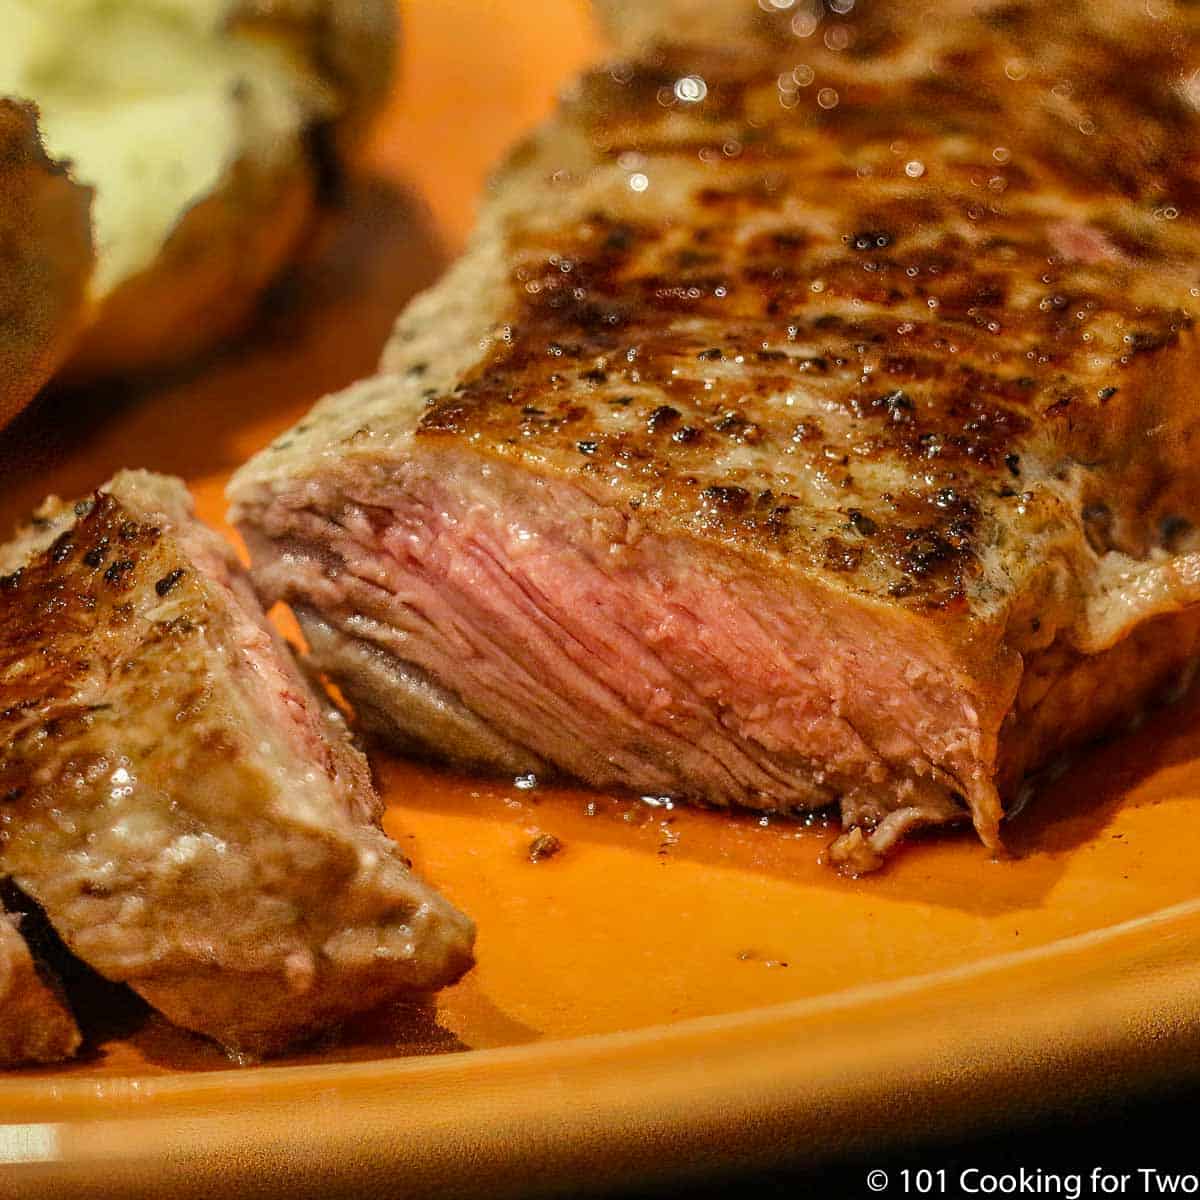
After achieving a beautiful sear, the steak is transferred to a preheated oven to finish cooking to your desired internal temperature. This method ensures gentle, even cooking and prevents the exterior from burning before the interior is cooked through.
Oven Temperature:
The ideal oven temperature for finishing New York strip steaks is typically between 375°F and 425°F (190°C to 220°C). A hotter oven will cook the steak more quickly, while a slightly lower temperature offers more control. For most home cooks, 400°F (200°C) is a reliable temperature.
Transfer and Baking:
- Transfer: Once seared, immediately transfer the skillet with the steak into the preheated oven.
- Cook Time: This is where the “how long” question becomes most relevant. The cooking time will vary significantly based on the steak’s thickness, the starting temperature of the steak (refrigerated vs. room temperature), and your desired level of doneness. As a general guideline for a 1 to 1.5-inch thick steak at 400°F (200°C):
- Rare: 4-6 minutes (Internal temperature: 120-125°F / 49-52°C)
- Medium-Rare: 6-9 minutes (Internal temperature: 130-135°F / 54-57°C)
- Medium: 9-12 minutes (Internal temperature: 140-145°F / 60-63°C)
- Medium-Well: 12-15 minutes (Internal temperature: 150-155°F / 66-68°C)
- Well-Done: 15+ minutes (Internal temperature: 160°F+ / 71°C+) – Note: While possible, cooking a New York strip to well-done is generally discouraged as it can lead to toughness and diminished flavor.
The Importance of a Meat Thermometer
The most accurate way to determine doneness is by using an instant-read meat thermometer. Insert the thermometer into the thickest part of the steak, avoiding bone or fat. It’s crucial to remember that the steak’s temperature will rise an additional 5-10°F (3-5°C) as it rests. Therefore, remove the steak from the oven when it is 5°F (3°C) below your target temperature.
Resting: The Crucial Final Step
After the steak has reached its target internal temperature, it’s imperative to let it rest. This is a non-negotiable step in achieving a tender and juicy steak.
Why Resting is Essential
When steak cooks, the muscle fibers contract, pushing moisture towards the center. If you cut into the steak immediately after cooking, this concentrated moisture will spill out onto the plate, leaving the steak dry. Resting allows the muscle fibers to relax and reabsorb the juices, resulting in a significantly more succulent and flavorful steak. Think of it as allowing the steak to rehydrate itself.
How to Rest Your Steak
- Tent with Foil: Transfer the steak from the skillet to a clean cutting board. Loosely tent it with aluminum foil. Avoid wrapping it tightly, as this will continue to cook the steak and can steam the crust you worked so hard to create.
- Resting Time: Allow the steak to rest for at least 5-10 minutes. For thicker steaks, a rest of 10-15 minutes is ideal. This duration is crucial for the juices to redistribute evenly.
Variations and Advanced Techniques
While the searing and oven-finishing method is widely regarded as the gold standard, several variations can enhance the experience, particularly for those who enjoy experimenting with culinary techniques while on vacation or exploring different cuisines.
Reverse Sear Method
For an incredibly even cook from edge to edge, consider the reverse sear.
- Oven First: Place a seasoned New York strip steak on a wire rack set inside a baking sheet. Cook in a low oven (around 250°F / 120°C) until the internal temperature reaches about 10-15°F below your desired final doneness.
- Sear Last: Remove the steak from the oven and let it rest briefly. Then, sear it in a smoking hot skillet with oil for 60-90 seconds per side, just to develop the crust. This method yields a steak with minimal gray band and exceptional tenderness.
Broiler Finish
If an oven-safe skillet isn’t available or preferred, the broiler can be used.
- Sear: Sear the steak as usual in a regular skillet on the stovetop.
- Broil: Transfer the seared steak to a broiler-safe pan or directly onto the oven rack (on a rack that can catch drips). Broil for a few minutes per side, watching carefully to prevent burning, until the desired internal temperature is reached. The broiler offers intense, direct heat, similar to grilling, and requires constant attention.
Temperature Considerations for Different Environments
When traveling, cooking conditions can vary.
- Hotel Kitchens: Many hotel suites or resort villas are equipped with basic kitchens. The principles outlined here apply directly. However, be mindful of ventilation; searing can produce smoke.
- Airbnb/Vacation Rentals: These often provide well-equipped kitchens, making them ideal for preparing restaurant-quality meals like a New York strip.
- Campgrounds/Outdoor Cooking: While less common for oven-baked steaks, if you have access to a Dutch oven with a lid that can be placed over coals, you can simulate oven cooking. This requires significantly more practice and temperature control.
The ability to prepare a perfectly cooked New York strip steak in various settings transforms a simple meal into a memorable part of any travel experience, adding a touch of home-style comfort or sophisticated dining to your adventures.
LifeOutOfTheBox is a participant in the Amazon Services LLC Associates Program, an affiliate advertising program designed to provide a means for sites to earn advertising fees by advertising and linking to Amazon.com. Amazon, the Amazon logo, AmazonSupply, and the AmazonSupply logo are trademarks of Amazon.com, Inc. or its affiliates. As an Amazon Associate we earn affiliate commissions from qualifying purchases.