
Growing sweet potatoes in Florida can be a rewarding endeavor, offering a taste of home-grown goodness and the satisfaction of cultivating a versatile and delicious crop. The Sunshine State’s warm climate and extended growing season provide an ideal environment for these tropical tubers to thrive. This guide will walk you through the essential steps, from selecting the right varieties to harvesting your bounty, ensuring a successful and abundant sweet potato harvest in your Florida garden.
Understanding Sweet Potatoes and Florida’s Climate
Sweet potatoes (Ipomoea batatas) are not true potatoes but rather a root vegetable belonging to the morning glory family. They are warm-season crops that require a long, frost-free growing period to develop their characteristic sweet, starchy tubers. Florida’s climate, particularly in the southern regions, offers a distinct advantage for sweet potato cultivation, with many areas experiencing minimal frost and a prolonged warm spell from spring through fall.
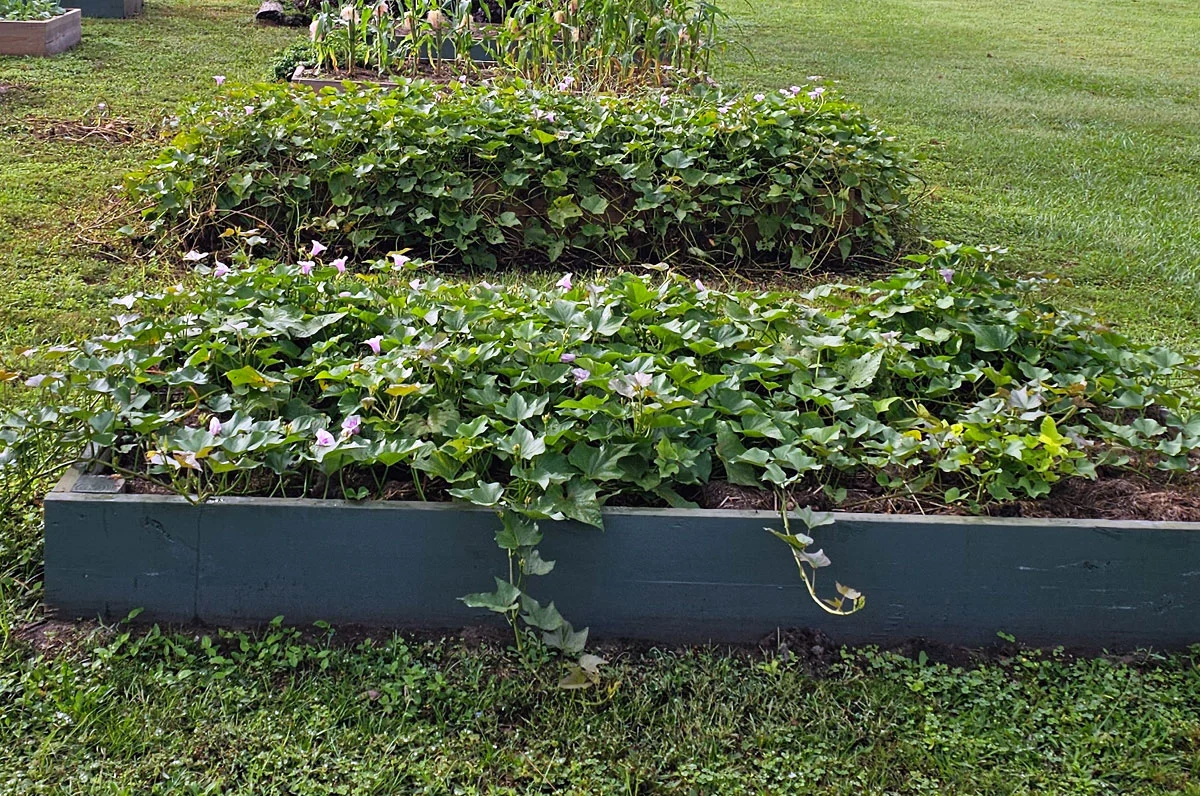
Optimal Growing Conditions in Florida
The key to successful sweet potato growth in Florida lies in understanding and leveraging the state’s unique environmental factors.
- Temperature: Sweet potatoes thrive in temperatures between 70°F and 90°F (21°C to 32°C). They are sensitive to frost and can be damaged by temperatures below 50°F (10°C). This makes planting after the last frost in spring crucial, and harvesting before the first significant cold snap in fall.
- Sunlight: Full sun is essential for vigorous growth and good tuber development. Aim for at least six to eight hours of direct sunlight per day.
- Soil: Well-draining, sandy loam is ideal for sweet potatoes. While they can tolerate a range of soil types, heavy clay soils can impede tuber expansion and lead to rot. Amending your soil with compost or aged manure will improve drainage and fertility. A slightly acidic to neutral pH (5.5 to 6.8) is preferred.
- Moisture: Consistent moisture is important, especially during the initial establishment phase and while the tubers are developing. However, avoid waterlogged conditions, which can lead to root rot. Drip irrigation or soaker hoses are excellent methods for delivering water directly to the root zone.
Florida’s Growing Seasons
Florida’s climate generally supports two potential growing seasons for sweet potatoes:
- Spring Planting: The most common planting time is from April through June, after the risk of frost has passed. This allows the plants ample time to mature before the cooler weather of late fall.
- Summer Planting (in some regions): In South Florida, where the growing season is longer and winters are milder, a second planting in late July or early August might be possible, but it carries a higher risk of encountering cooler temperatures before full maturity. It’s advisable to consult local agricultural extension offices for specific planting dates tailored to your microclimate.
Selecting and Planting Your Sweet Potatoes
The foundation of a successful sweet potato harvest begins with selecting healthy planting material and preparing your garden bed for optimal growth.
Choosing the Right Sweet Potato Varieties
Numerous sweet potato varieties exist, each offering unique characteristics in terms of color, flavor, texture, and storage life. When choosing, consider your personal preferences and the growing conditions in your specific area of Florida.
- ‘Beauregard’: A popular and reliable variety known for its reddish-purple skin, orange flesh, and sweet flavor. It’s a vigorous grower and generally produces well in Florida.
- ‘Covington’: Another excellent choice, offering good disease resistance and a sweet, moist flesh. It has copper-colored skin and is a consistent producer.
- ‘Jewel’: Features copper skin and orange flesh, known for its excellent flavor and smooth texture. It is also a strong performer in warmer climates.
- ‘Okinawa’: Distinctive for its purple skin and flesh, this variety is rich in antioxidants. It’s slightly drier than its orange-fleshed counterparts but offers a unique taste.
- ‘Murasaki’: A Japanese variety with purple skin and a creamy white, moist flesh. It has a nutty, sweet flavor and is good for baking.
Sourcing Your “Slips”
Sweet potatoes are not typically grown from seed, but rather from “slips,” which are young, rooted sprouts grown from mature sweet potato tubers. You can obtain slips in several ways:
- Nursery or Garden Center: Many local garden centers and nurseries in Florida will stock sweet potato slips during the planting season.
- Online Retailers: Numerous online suppliers specialize in vegetable slips and will ship them directly to your door. Ensure you order them to arrive just before your intended planting date.
- Growing Your Own Slips: If you have a mature sweet potato, you can “start” your own slips indoors about 4-6 weeks before your last frost date. Place the sweet potato in a shallow dish of water, cut-side down, with toothpicks to suspend it. Keep it in a warm, sunny location. Sprouts will emerge, and once they are 6-8 inches long and have a few leaves, you can gently snap them off and root them in water or moist potting mix for about a week before planting.
Preparing the Garden Bed
Proper bed preparation is crucial for ensuring your sweet potatoes have the best start.
- Loosen the Soil: Till or double-dig the soil to a depth of at least 8-12 inches. This allows for easier root expansion.
- Incorporate Organic Matter: Mix in a generous amount of compost, well-rotted manure, or other organic amendments. This improves soil structure, drainage, and fertility.
- Create Raised Beds or Mounds (Recommended): For Florida’s often humid conditions and potentially heavy soils, growing sweet potatoes on raised beds or mounds is highly beneficial. Mounds should be at least 10-12 inches high and 18-24 inches wide. This ensures excellent drainage and warmer soil temperatures.
- Fertilization (Optional): Sweet potatoes generally don’t require heavy fertilization. If your soil is poor, you can incorporate a balanced, slow-release fertilizer at planting time, but avoid high-nitrogen fertilizers, which promote vine growth over tuber development. A soil test is always recommended to determine specific nutrient needs.
Planting the Slips
Once your garden bed is prepared and the danger of frost has passed, it’s time to plant.
- Timing: Plant slips in Florida from April through June, or as recommended by your local extension office.
- Spacing: Space the slips 12-18 inches apart in rows that are 3-4 feet apart. If planting on mounds, place 2-3 slips per mound, spaced about 12 inches apart.
- Planting Technique: Dig a hole deep enough to accommodate the roots and the lower portion of the slip. Gently spread the roots out and firm the soil around them. If planting slips that have been rooted in water, ensure the entire root system and the bottom 2-3 inches of the stem are buried.
- Watering: Immediately after planting, water the slips thoroughly to settle the soil and reduce transplant shock.
Caring for Your Growing Sweet Potatoes
Sweet potatoes are relatively low-maintenance once established, but consistent care will ensure a bountiful harvest.

Watering and Mulching
- Watering: During the first few weeks after planting, water regularly to help the slips establish. Once the plants are growing vigorously, they become more drought-tolerant. However, consistent moisture is crucial during the tuber formation period (approximately 60-90 days after planting). Aim for about 1-2 inches of water per week, either from rainfall or irrigation. Reduce watering in the weeks leading up to harvest to prevent cracking.
- Mulching: Applying a layer of organic mulch (straw, pine needles, compost) around the base of the plants is highly beneficial. Mulch helps retain soil moisture, suppresses weeds, regulates soil temperature, and prevents soil-borne diseases from splashing onto the leaves.
Weed Control
Weeds compete with sweet potatoes for water, nutrients, and sunlight.
- Early Stages: Hand-pull weeds when they are small and manageable, especially during the first few weeks after planting. Be careful not to disturb the developing roots.
- Mature Plants: Once the sweet potato vines spread and cover the ground, they will naturally suppress many weeds.
Pest and Disease Management
While generally hardy, sweet potatoes can be susceptible to a few pests and diseases in Florida.
- Common Pests:
- Sweet Potato Weevil: This is a serious pest that bores into the roots and vines. Look for wilting vines and small holes. Crop rotation and resistant varieties are key.
- Whiteflies: These small, white insects can infest the undersides of leaves. They can be managed with insecticidal soap or neem oil.
- Flea Beetles: These tiny, jumping beetles can chew small holes in the leaves. Healthy plants can usually tolerate minor infestations.
- Common Diseases:
- Soil-borne Diseases: Fungal and bacterial diseases can occur in poorly drained or overly wet soils, leading to root rot. Proper soil preparation, raised beds, and crop rotation are essential preventive measures.
- Leaf Spot: Fungal leaf spots can appear, usually on older leaves. Good air circulation and avoiding overhead watering can help.
Integrated Pest Management (IPM) is recommended. Regularly inspect your plants for any signs of trouble and use the least toxic methods first. Consult with your local UF/IFAS Extension office for specific recommendations for your region.
Fertilization (Minimal Need)
As mentioned earlier, sweet potatoes are not heavy feeders. If you prepared your soil well with organic matter, additional fertilization may not be necessary. If your plants appear stunted or yellow, a light application of a balanced fertilizer (e.g., 10-10-10) or a side dressing of compost can be beneficial, applied about 4-6 weeks after planting. Avoid excessive nitrogen.
Harvesting and Storing Your Sweet Potatoes
The culmination of your efforts comes with harvesting your sweet potatoes. Understanding the signs of maturity and proper harvesting techniques will ensure you get the best quality tubers.
Determining When to Harvest
Sweet potatoes typically take between 90 to 120 days from planting to reach maturity, depending on the variety and growing conditions.
- Vine Appearance: The vines will continue to grow throughout the season. However, as the tubers mature, the vines may start to slow their growth and appear less vigorous.
- Tubers: The most reliable indicator is to carefully dig up a few plants to check the size of the tubers. Gently scrape away the soil around a developing tuber. If it’s reached your desired size (typically 3-6 inches long), it’s likely ready.
- Frost Warning: In Florida, it’s crucial to harvest before the first hard frost. Frost will damage the tubers, rendering them inedible. As the weather begins to cool in late fall, be prepared to harvest.
Harvesting Techniques
Harvesting requires care to avoid damaging the tubers.
- Stop Watering: About a week to ten days before you plan to harvest, stop watering your sweet potato plants. This helps the skins to “cure” and toughen up, reducing bruising and improving storage life.
- Prepare Your Tools: You’ll need a digging fork or shovel.
- Digging: Carefully insert the digging fork or shovel into the soil about 12 inches away from the base of the plant. Work your way around the plant, loosening the soil. This helps to avoid puncturing the tubers.
- Lifting: Gently lift the entire plant and the attached tubers from the ground.
- Handling: Handle the harvested sweet potatoes with care. Bruised or damaged tubers will not store well. Avoid dropping them or throwing them.
Curing Your Sweet Potatoes
Curing is a critical step for developing the characteristic sweetness and improving the storage life of sweet potatoes.
- Process: After harvesting, allow the sweet potatoes to cure in a warm, humid environment for about 5-10 days. The ideal temperature is between 80°F and 85°F (27°C to 29°C) with high humidity.
- Methods: You can achieve this by placing them in a greenhouse, a warm, enclosed space like a shed or garage, or even a well-ventilated oven set at its lowest temperature with the door ajar (ensure they don’t cook).
- Benefits: During curing, starches in the sweet potatoes convert to sugars, making them sweeter. It also heals minor nicks and bruises, and toughens the skin, preparing them for storage.
Storing Sweet Potatoes
Properly cured sweet potatoes can be stored for several months.
- Conditions: Store cured sweet potatoes in a cool, dark, and humid place. An ideal storage temperature is between 55°F and 60°F (13°C to 16°C). Avoid storing them in the refrigerator, as cold temperatures damage their flavor and texture.
- Methods:
- Crates or Bins: Place them in shallow wooden crates, cardboard boxes, or baskets, ensuring they are not piled too high. You can line the containers with newspaper or straw for cushioning.
- Avoid Plastic Bags: Do not store them in sealed plastic bags, as this can trap moisture and lead to rot.
- Inspection: Periodically check your stored sweet potatoes and remove any that show signs of spoilage.
By following these guidelines, you can successfully cultivate and enjoy a delicious harvest of sweet potatoes from your Florida garden, adding a taste of local bounty to your table.
LifeOutOfTheBox is a participant in the Amazon Services LLC Associates Program, an affiliate advertising program designed to provide a means for sites to earn advertising fees by advertising and linking to Amazon.com. Amazon, the Amazon logo, AmazonSupply, and the AmazonSupply logo are trademarks of Amazon.com, Inc. or its affiliates. As an Amazon Associate we earn affiliate commissions from qualifying purchases.