
The vibrant, slightly sweet, and delightfully smoky flavor of roasted New Mexico Hatch chiles is an iconic taste of the American Southwest. For many, the annual arrival of these beloved peppers signifies the true beginning of autumn, a culinary tradition deeply intertwined with the New Mexico landscape and its rich heritage of local culture and food. Whether you’re a seasoned aficionado or a curious newcomer, mastering the art of roasting these special chiles is a rewarding experience that unlocks a world of delicious possibilities. This guide will walk you through everything you need to know, from selecting the perfect peppers to preserving their unparalleled flavor.

The Allure of the Hatch Chile
Hatch chiles are a specific variety of pepper grown exclusively in the Hatch Valley of New Mexico. This unique microclimate, with its fertile soil, ample sunshine, and cool desert nights, is credited with imparting the chiles’ distinctive character. Unlike their more uniformly spicy cousins, Hatch chiles offer a delightful spectrum of heat, ranging from mild to intensely hot, all while maintaining a characteristic sweetness and a tender, easy-to-roast flesh. Their seasonality is brief, typically available from late summer through early fall, making their appearance a cause for celebration and culinary anticipation.
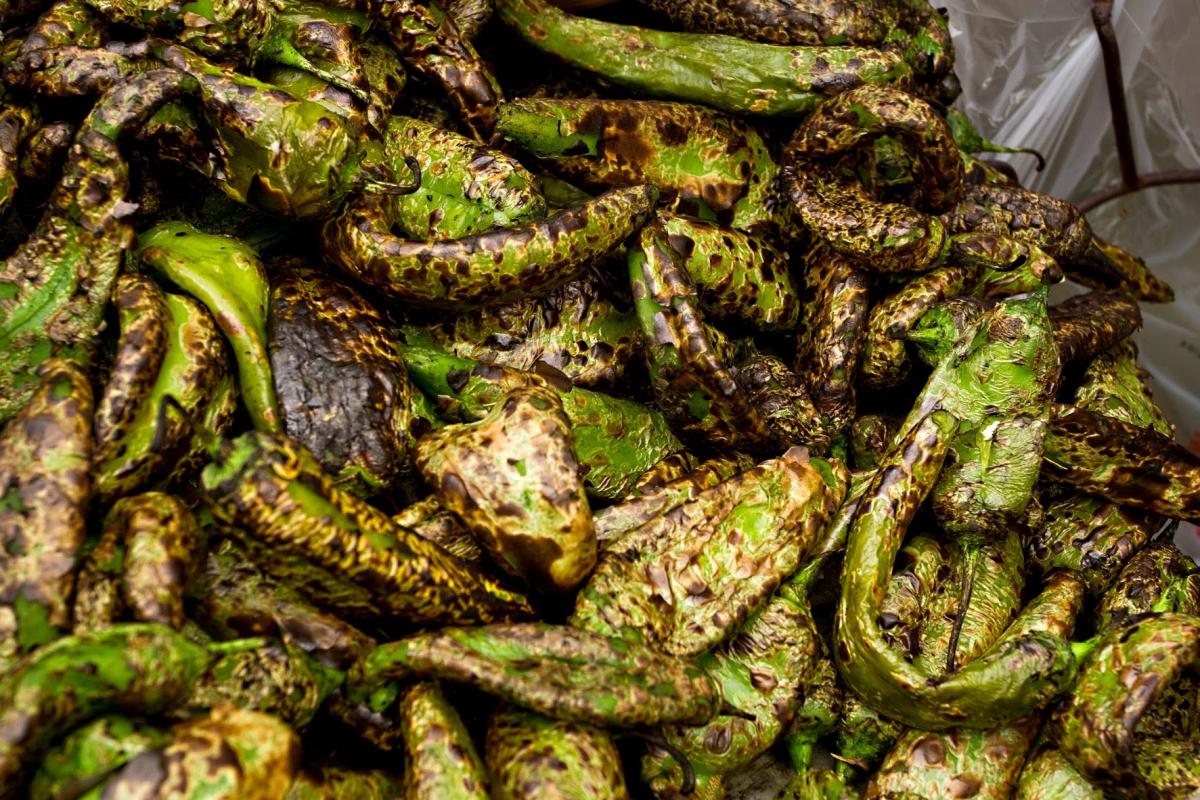
The roasting process is not merely a cooking method; it’s a ritual. It transforms the raw pepper into something magical, taming its heat while intensifying its inherent sweetness and introducing a smoky depth that is utterly irresistible. This smoky essence is what many associate with the very soul of New Mexico cuisine.
Why Roast Your Hatch Chiles?
The reasons to roast Hatch chiles are as numerous as the recipes they inspire. Roasting achieves several key transformations:
- Enhanced Flavor: The intense heat of roasting causes the natural sugars in the chiles to caramelize, bringing out a rich sweetness and a complex depth that raw peppers simply don’t possess.
- Smoky Infusion: The direct heat, whether from a grill, broiler, or open flame, imparts a quintessential smoky flavor that is highly sought after. This is particularly true when roasting over an open flame, mimicking the traditional methods used in New Mexico.
- Easier Peeling: The skin of the pepper blisters and loosens during roasting, making it incredibly easy to peel away, leaving behind the tender, flavorful flesh. This smooth texture is perfect for incorporation into various dishes.
- Versatility: Roasted Hatch chiles are incredibly versatile. They can be used fresh in salsas, pureed into sauces, stuffed, grilled, added to soups and stews, or even incorporated into baked goods. Their flavor profile complements a vast array of dishes, making them a staple in many New Mexico kitchens.
Preparing for the Perfect Roast
Before you embark on your roasting adventure, a little preparation ensures a smooth and successful outcome. This involves selecting the right chiles and gathering your essential tools.
Selecting Your Hatch Chiles
When choosing your Hatch chiles, consider the variety and your preferred heat level. Hatch chiles come in two primary categories:
- Mild: These offer a gentle warmth and are perfect for those who prefer flavor over heat. They are excellent for dishes where you want the chile’s sweetness to shine without overpowering other ingredients.
- Hot: For those who enjoy a more pronounced kick, the hot varieties deliver a satisfying level of heat. Even the “hot” versions, however, are generally less fiery than many other chile varieties, retaining their characteristic sweetness.
What to look for when selecting chiles:
- Firmness: Choose chiles that feel firm and plump, without soft spots or shriveling.
- Smooth Skin: The skin should be relatively smooth and glossy, indicating freshness.
- Color: The color will vary depending on the ripeness and variety, but aim for a vibrant hue.
- Weight: A good chile will feel substantial for its size, indicating a good amount of flesh.
If you’re lucky enough to be in New Mexico during the roasting season, you’ll find many local markets and festivals offering freshly roasted chiles. This is an ideal way to experience them at their peak. However, you can also purchase fresh chiles and roast them yourself at home.
Essential Roasting Equipment
The beauty of roasting Hatch chiles is that it doesn’t require specialized equipment. You likely have most of what you need in your kitchen.
- Baking Sheet: A sturdy baking sheet is essential for oven roasting.
- Tongs: For turning the chiles and handling them when hot.
- Bowl: A large bowl for steaming and cooling the chiles.
- Oven: Your standard kitchen oven can be used.
- Broiler: The broiler setting is a quick and effective method for roasting.
- Gas Stove Burner: Roasting directly over a gas flame offers a classic smoky char.
- Grill: An outdoor grill (charcoal or gas) provides excellent results and a true smoky flavor.
- Plastic Bag or Bowl with Lid: For steaming the chiles after roasting.
- Paper Towels or Clean Kitchen Towels: For drying the chiles.
- Gloves (Optional but Recommended): Chile oils can irritate skin, so gloves are a good idea, especially when handling large quantities.
Methods for Roasting New Mexico Hatch Chiles
There are several effective methods for roasting Hatch chiles, each offering slightly different results and levels of convenience. The best method for you will depend on your equipment, time, and desired level of smoky flavor.
Method 1: Oven Roasting
Oven roasting is a reliable and relatively hands-off method, ideal for larger batches.
- Preheat: Preheat your oven to 400-450°F (200-230°C).
- Arrange: Spread the Hatch chiles in a single layer on a baking sheet. Avoid overcrowding the pan, as this will steam the chiles rather than roast them.
- Roast: Place the baking sheet in the preheated oven. Roast for 15-25 minutes, or until the skins are blackened and blistered on all sides.
- Turn: Use tongs to turn the chiles every 5-7 minutes to ensure even roasting and blistering.
- Steam: Once the skins are sufficiently blackened, remove the baking sheet from the oven. Immediately transfer the hot chiles to a large bowl. Cover the bowl tightly with plastic wrap or a lid, or place them in a large plastic bag and seal it. Let them steam for 10-15 minutes. This steaming process loosens the skins, making them easier to peel.

Method 2: Broiler Roasting
Using the broiler is a faster method, delivering a good char quickly.
- Position Rack: Place an oven rack about 4-6 inches from the broiler element.
- Arrange: Place the Hatch chiles on a baking sheet or directly on the oven rack (if it’s sturdy and you don’t mind a few drips).
- Broil: Turn the broiler on high. Broil for 5-10 minutes per side, watching closely. The chiles should blacken and blister quickly.
- Turn: Use tongs to carefully turn the chiles to ensure even charring on all sides.
- Steam: Once the skins are blackened and blistered, remove from the oven and steam as described in the oven-roasting method.
Method 3: Gas Stove Burner Roasting
This method imparts a more intense smoky flavor, mimicking traditional open-fire roasting. It requires a gas stove and a watchful eye.
- Direct Heat: Place a single chile directly over a medium-high gas flame.
- Turn and Rotate: Use tongs to constantly turn and rotate the chile, ensuring even charring on all sides. This process is more hands-on and requires your full attention.
- Monitor: Be patient; it can take 5-10 minutes per chile for the skin to become thoroughly blackened and blistered.
- Steam: As each chile is roasted, place it in a bowl to steam. Once all chiles are roasted, proceed with peeling.
Method 4: Grill Roasting
Grilling offers a fantastic smoky flavor and is perfect if you’re already firing up the grill.
- Preheat Grill: Preheat your grill to medium-high heat.
- Direct Heat: Place the Hatch chiles directly on the grill grates.
- Turn and Grill: Grill for about 5-10 minutes per side, turning frequently with tongs until the skins are blackened and blistered.
- Steam: Remove from the grill and steam in a covered bowl or bag.
Peeling and Storing Your Roasted Chiles
Once your roasted chiles have steamed, the peeling process is remarkably simple.
Peeling the Roasted Chiles
- Remove Skin: Take one steamed chile at a time. The blackened skin should slip off easily. You can use your fingers, a paring knife, or even a paper towel to help rub off the loosened skin.
- Remove Stem and Seeds (Optional): Gently twist off the stem. If you prefer less heat, you can carefully slice open the chile and scrape out the seeds and membranes. For milder dishes, removing the seeds is recommended. For dishes where you want more heat, leave them in.
- Rinse (Optional): Some people like to rinse the chiles under cool water after peeling to remove any residual charred bits. This is optional and can wash away some of the smoky flavor. Pat them dry thoroughly if you rinse them.
Storing Your Roasted Chiles
Proper storage is key to enjoying your roasted Hatch chiles for as long as possible.
- Refrigeration: Cooled, peeled, and seeded chiles can be stored in an airtight container in the refrigerator for up to a week. They are excellent for immediate use in fresh salsas or quick meals.
- Freezing: For longer storage, freezing is ideal.
- Whole or Chopped: You can freeze peeled and seeded chiles whole or chopped.
- Freezer Bags: Place them in freezer-safe bags, pressing out as much air as possible.
- Flash Freezing (Optional): For individual portions, you can flash-freeze chopped chiles on a baking sheet until solid, then transfer them to a freezer bag. This prevents them from clumping together.
- Label and Date: Always label your bags with the contents and the date. Frozen roasted Hatch chiles can last for several months, up to a year.
Culinary Delights: Using Your Roasted Hatch Chiles
The true joy of roasting Hatch chiles lies in their incredible culinary versatility. They are a cornerstone of New Mexico cuisine and can elevate countless dishes.
Classic Applications
- Salsa Roja: A staple in New Mexico, roasted Hatch chiles form the base of many vibrant salsas. Blend them with tomatoes, onion, garlic, cilantro, and lime juice for a refreshing accompaniment to chips or any meal.
- Green Chile Stew: Arguably the most iconic dish featuring Hatch chiles, this hearty stew is a must-try. It typically includes pork or chicken, potatoes, onions, garlic, and, of course, plenty of roasted green Hatch chiles.
- Enchiladas: Layering roasted red or green Hatch chiles into enchiladas adds a depth of flavor that is unparalleled. They can be mixed into the filling or layered with cheese and sauce.
- Stuffed Chiles: Roasted Hatch chiles can be stuffed with various fillings, such as cheese, ground meat, or even rice and beans, then breaded and fried for a delicious appetizer or main course.
Beyond the Classics
Don’t limit yourself to traditional dishes. Roasted Hatch chiles can add a unique flair to:
- Soups and Chowders: Stir them into corn chowder, potato soup, or tortilla soup for an extra layer of flavor and a subtle kick.
- Dips and Spreads: Puree them into creamy dips, hummus, or cheese spreads for a Southwestern twist.
- Grilled Meats and Vegetables: Grill them alongside your favorite meats or vegetables, or use them as a flavorful rub.
- Eggs and Breakfast Dishes: Add chopped roasted chiles to omelets, scrambled eggs, or breakfast burritos.
- Baked Goods: Surprisingly, roasted chiles can add a savory dimension to cornbread, muffins, and even some savory cakes.
The journey of roasting New Mexico Hatch chiles is more than just a cooking technique; it’s an immersion into the flavors and traditions of a special region. From the fertile Hatch Valley to your kitchen, these peppers offer a taste of authentic New Mexico that is both deeply satisfying and endlessly creative. So, embrace the season, fire up your preferred roasting method, and discover the delicious magic of perfectly roasted Hatch chiles.
LifeOutOfTheBox is a participant in the Amazon Services LLC Associates Program, an affiliate advertising program designed to provide a means for sites to earn advertising fees by advertising and linking to Amazon.com. Amazon, the Amazon logo, AmazonSupply, and the AmazonSupply logo are trademarks of Amazon.com, Inc. or its affiliates. As an Amazon Associate we earn affiliate commissions from qualifying purchases.